Using H2O with Azure - BETA
Microsoft Azure provides an important collection of cloud services, such as serverless computing, virtual machines, storage options, networking, and much more. Azure provides the tools for a user to create a Data Science environment with H2O.
This section describes the two H2O options currently available on Microsoft Azure:
- The H2O Artificial Intelligence VM solution
- The H2O application for HDInsight
Note: This feature is currently in Beta and should be used for testing purposes only.
H2O Artificial Intelligence VM
The Artificial Intelligence VM automatically deploys an H2O standalone VM or an H2O cluster in Azure along with every tool you might need for your data science applications. Once the deployment finishes you can:
- Connect to Jupyter Notebook by going to https://<VM DNS Name or IP Address>:8000/
- Connect to H2O Flow by going to http://<VM DNS Name or IP Address>:54321/
The Artificial Intelligence VM uses a Linux data science virtual machine as a base. The key software included are:
- Latest version of H2O for Python and R
- Microsoft R Open
- Anaconda Python distribution (2.7 and 3.5)
- RStudio Server
- Azure Storage Explorer
- Azure Command-Line for managing Azure resources
- Azure SDK
- Libraries in R and Python for use in Azure Machine Learning
Create the H2O Artificial Intelligence VM
Perform the following steps to create the H2O Artificial Intelligence VM.
Log in to your Azure portal (https://portal.azure.com) and click the New button.
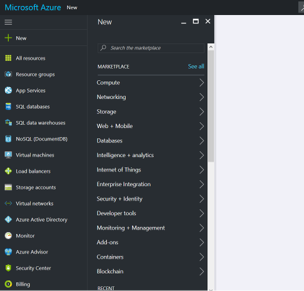
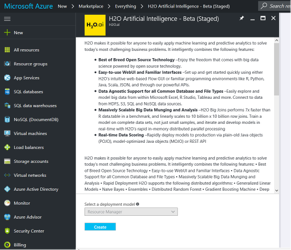
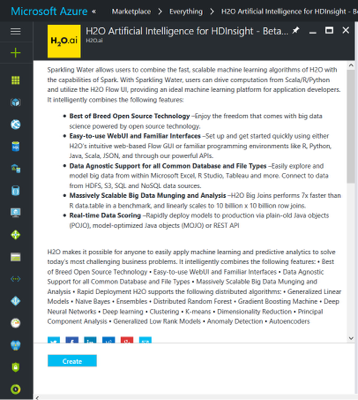
Search in the Marketplace for H2O. The search will return all of the H2O offers in the Azure Marketplace. Select the H2O Artificial Intelligence VM, and then click the Create button.
Follow the UI instructions and fill the Basic settings:
- Username and Password that you will be using to connect to the VM
- Subscriptions where you want to create the VM
- The new resource group name
- The Location where the VM is going to be created.
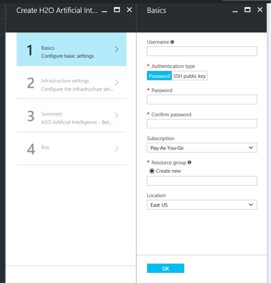
- Click OK and move to the next step, which is Infrastructure setting.
- Specify the desired Infrastructure settings:
- Select the number of VMs that you want to create. (Note that specifying more than one VM means that you will create an H2O cluster.)
- Specify the Storage Account. This represents the associated storage account for the VM
- Specify the Virtual Machine Size.
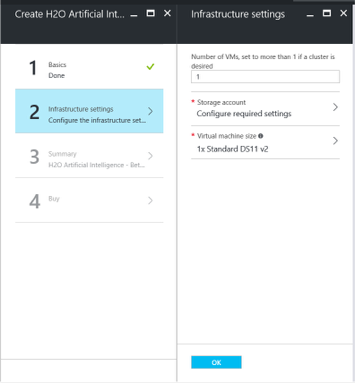
Click OK to begin the final validations. When the validations pass, click OK.
Finally, review the Terms of Use and H2O privacy policy. When you are, ready click Purchase.
The VM solution will be created upon completion. The expected creation time is approximately 10 minutes.
Once your deployment is created, locate your node-0, and look for the DNS Name and Public IP address. This is the way to access your node.
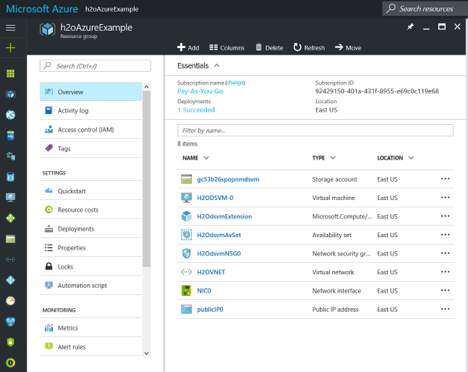
You are now ready to start using your H2O Artificial Intelligence VM! Go ahead and connect to H2O Flow or to your Jupyter notebooks and look for the H2O Examples to create your first H2O Model on Azure.
- Connect to Jupyter Notebook by going to https://<VM DNS Name or IP Address>:8000/
- Connect to H2O Flow by going to http://<VM DNS Name or IP Address>:54321/. (Note: Refer to Using Flow - H2O’s Web UI for information about using Flow.)
H2O Artificial Intelligence VM Troubleshooting Tips
Be aware that Azure subscriptions by default allow only 20 cores. If you get a Validation error on template deployment, this might be the cause. To increase the cores limit, follow these steps: https://blogs.msdn.microsoft.com/girishp/2015/09/20/increasing-core-quota-limits-in-azure/
OS Disk by default is small (approx 30GB). This means that you have approximately 16GB of free space to start with. This is the same for all VM sizes. It is recommended that you add an SSD data disk to the driver node (DSVM-0). You can do this by following these instructions: https://azure.microsoft.com/en-us/documentation/articles/virtual-machines-linux-classic-attach-disk/
Select a VM size that provides RAM of at least 4x the size of your dataset. Refer to the following for more information about Azure VM sizes: https://azure.microsoft.com/en-us/pricing/details/virtual-machines/
For H2O, Java heap size is set to the 90% of available RAM. If you need to use less heap size on the driver node (H2O-0), you must stop H2O and launch it again with less heap memory. For example:
killall -q -v java
nohup java -Xmx[WHAT-YOU-WANT]m -jar /dsvm/tools/h2o.jar -flatfile /dsvm/tools/flatfile.txt 1> /dev/null 2> h2o.err &
You will also need to run this command with
sudoonce the VM is restarted.
H2O Artificial Intelligence for HDInsight
The H2O Artificial Intelligence for HDInsight is an application you can install during the creation of a new HDInsight Cluster on Azure. This solution will install Sparkling Water on your spark cluster so you can exploit all the benefits from both Spark and H2O.
Create the H2O Artificial Intelligence for HDInsight
Follow the steps below to create a new H2O Artificial Intelligence for HDInsight.
Note: Steps 1-3 are required in order to get access to H2O Flow; otherwise, these steps are optional.
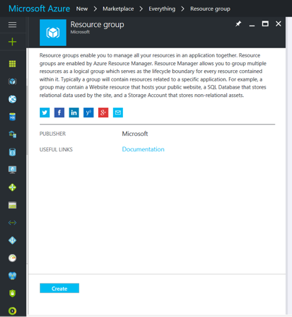
Log in to your Azure portal at https://azure.portal.com and create a new Resource Group.
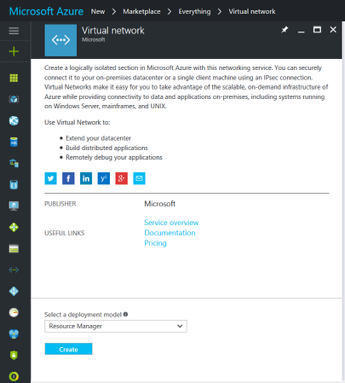
Create a Virtual Network in the Resource Group you created in Step 1.
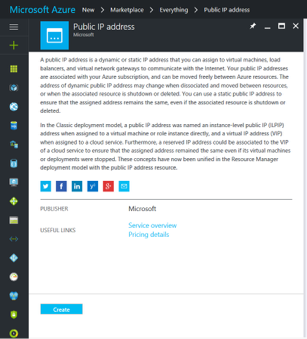
Create a public IP address to access H2O Flow.
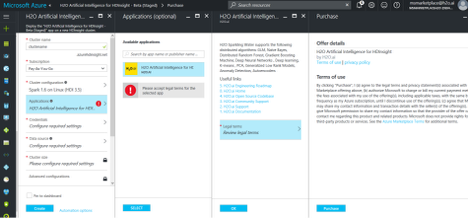
In your Azure portal at https://portal.azure.com, search for H2O. Select H2O Artificial Intelligence for HDInsight, and then click the Create button and follow the UI instructions.
Note H2O for HDInsight is exclusively for Spark and R Server HDI clusters version 3.5 (HDI v3.5).
On the Applications tab, select and accept the Terms of Use for H2O.
On the Credentials tab, specify the following:
- Cluster Login username and password. These are used to connect to your cluster.
- SSH Username and password. These are used to connect direcly to the VM present in the cluster.
On the Data Source tab, you can configure either a Storage Account or a Data Lake Store. This is where your HDFS system will be located. Azure HDI separates the computing from the storage in their Hadoop environment. While the VMs serve as the computing nodes, the storage of those VMs are not used as the File System but instead as an Azure Data Lake Store or an Azure Storage Account.
On the Cluster Size tab, select the number of workers nodes you want on your HDI Cluster. Note that you can resize your cluster any time after creation.
(This is an optional Step for access H2O Flow.) In Advance Configurations, select the Virtual Network created in step 2.
Select the existing resource group created in Step 1.
Click Create to begin the cluster creation. Note that the cluster creation can take up to 40 minutes.
Connect to your Jupyter Notebooks through https://<ClusterName>.azurehdinsight.net/jupyter, and log in using the Cluster Login username and password that you previously created.
In Jupyter, you will see 3 folders: PySparkling Examples, PySpark Examples, and Scala Examples. Select PySparkling Examples.
The first step when creating a new notebook is to configure the Spark environment. This information is included in the 4_sentiment_sparkling example. Important: For Spark 1.6 or 2.0, use the correct Maven coordinates.
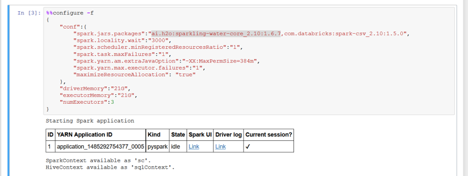
- Add the Sparkling Water Egg file.

- Start the H2O Cluster.

You are ready to start building your H2O Models.
Note: Flow users, take note of the private IP address displayed when you start the cluster. Locate the nodes that have the same IP address in the Azure portal, and take note of the Network Interface.
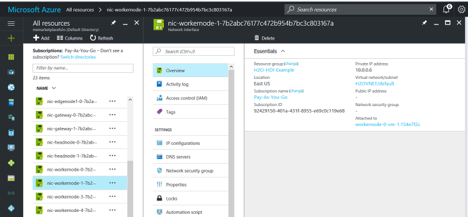
- Go to the Public IP address you created in Step 3, and click on Associate. For the Resource Type, select Network Interface, and the select the Network Interface from Step 17.
- Once the Public IP Address is associated with the correct network interface, connect to H2O Flow by going to http://<PUBLICIPADDRESS>:54321.
H2O Artificial Intelligence for HDInsight Troubleshooting Tips
- Make sure that you added the correct Maven coordinates and Python egg file when configuring the Spark environment.
- Make sure that the cluster has enough resources to allocate to your Spark application. For more information about the cluster available resources, go to http://<ClusterName>.azurehdinsight.net.