For IDEA Users (Github)
If you don’t have a Software Development Kit (SDK) on your system, you will need to install one first. For more information about SDKs, refer the IntelliJ IDEA website.
- Create a git clone of the H2O repository. From Source Code (Github)
- Open IDEA.
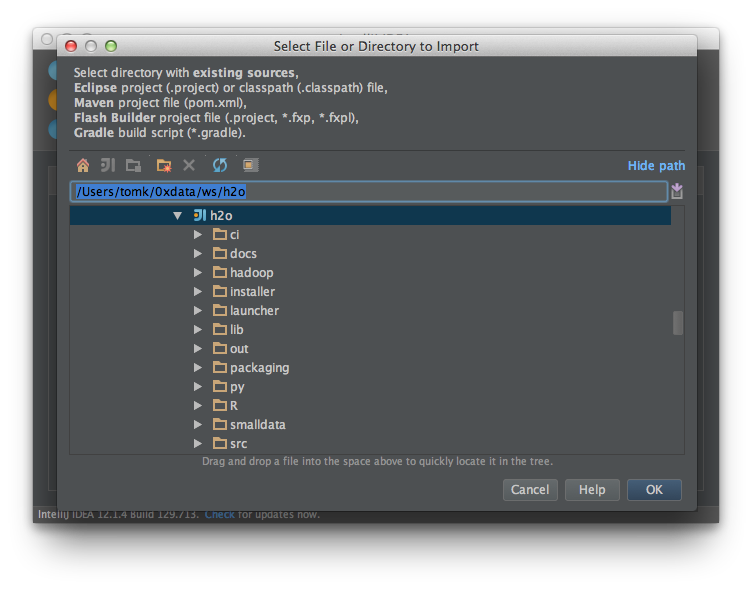
- Click Import Project.

- Choose the H2O directory and click OK.
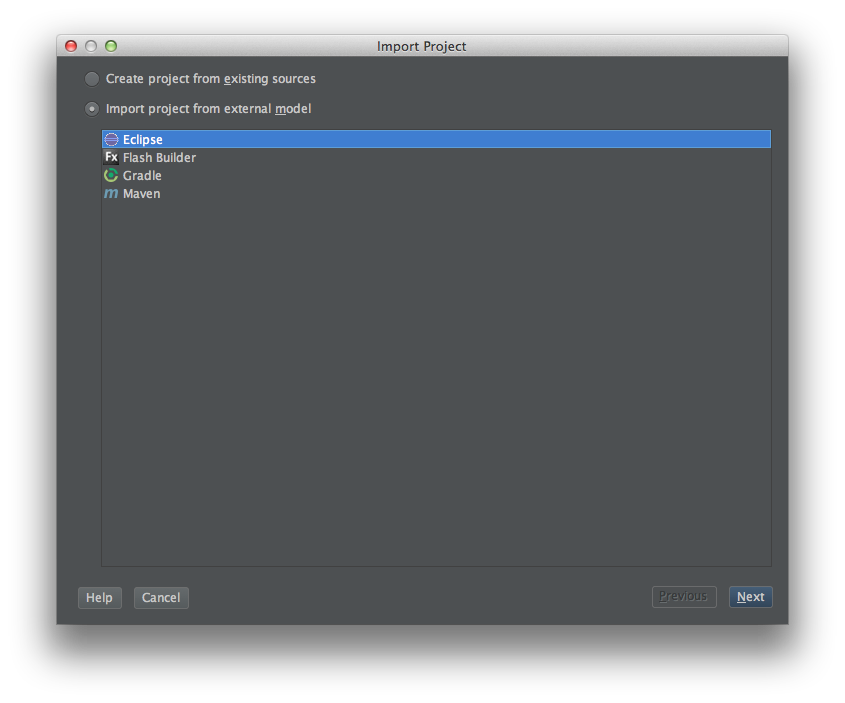
- Select the Import project from external model radio button and select Eclipse, then click Next.
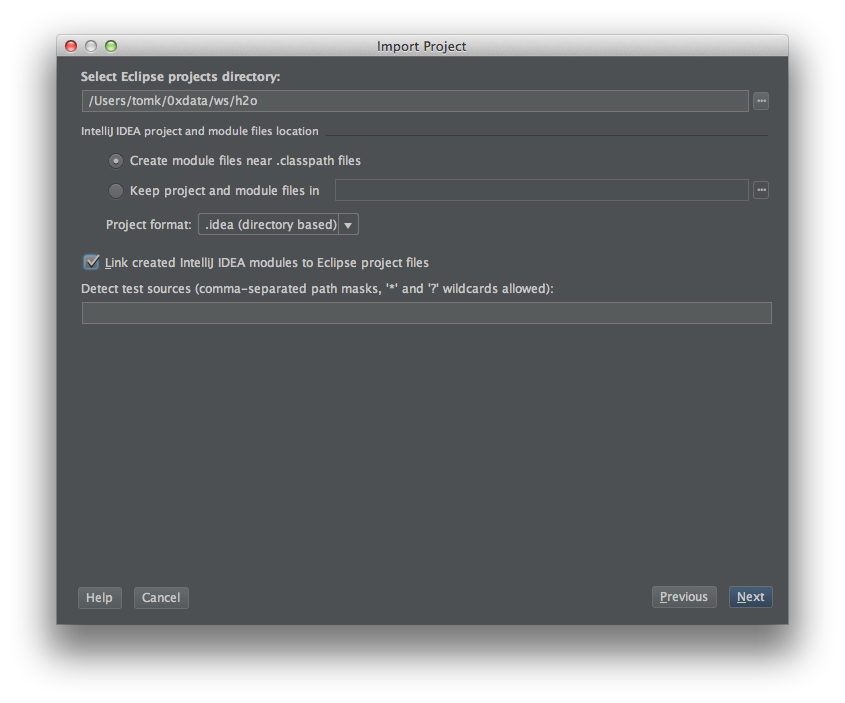
- Check the Link created Intellij IDEA modules to Eclipse project files checkbox (which is not selected by default) and click Next.
- H2O should be selected by default; if not, select it. If the “experiments” module is selected, uncheck it, then click Next.

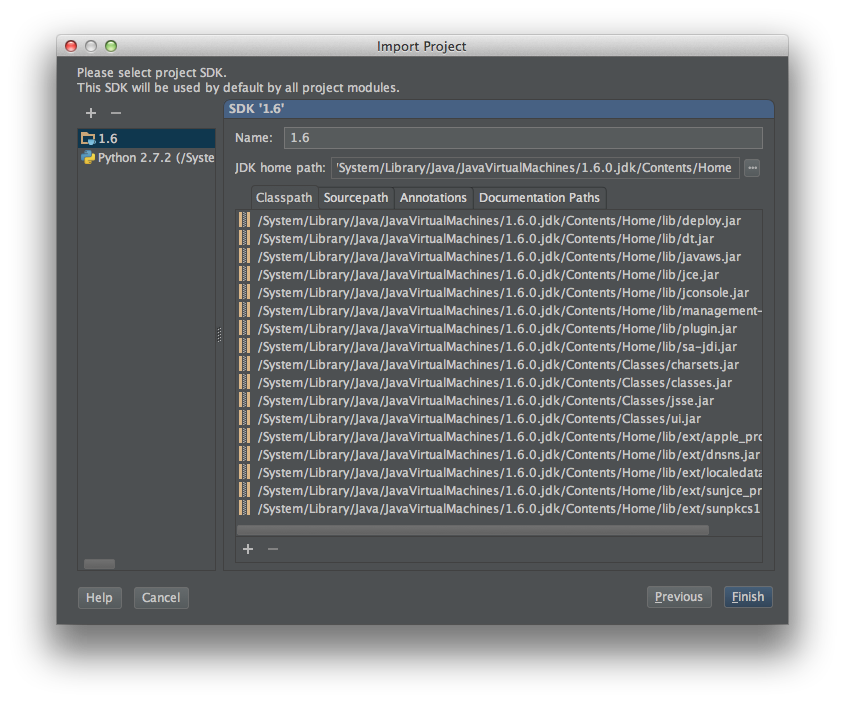
- SDK 1.6 or 1.7 should selected by default. If so, click Finish. If not, install an SDK and retry.
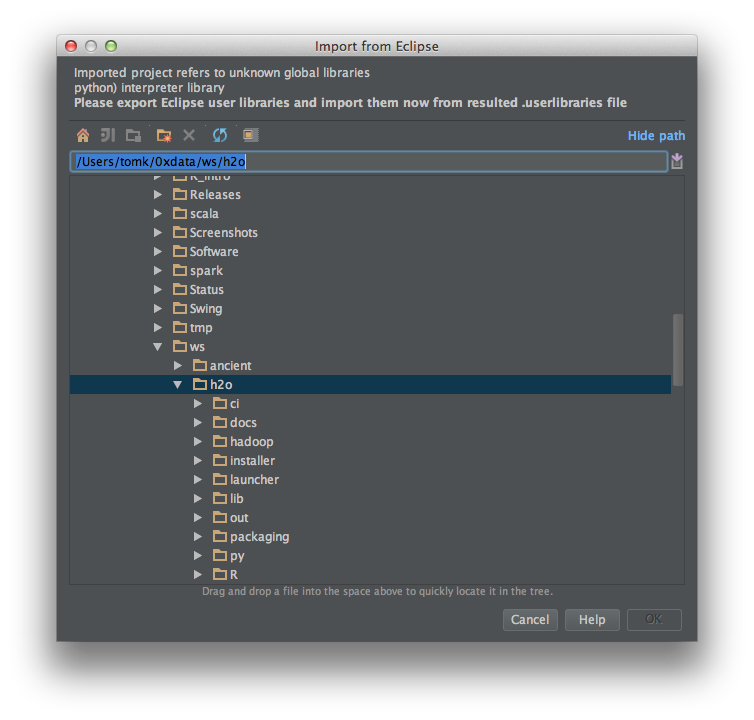
- (Import from Eclipse) If prompted for Python configuration, click Cancel.
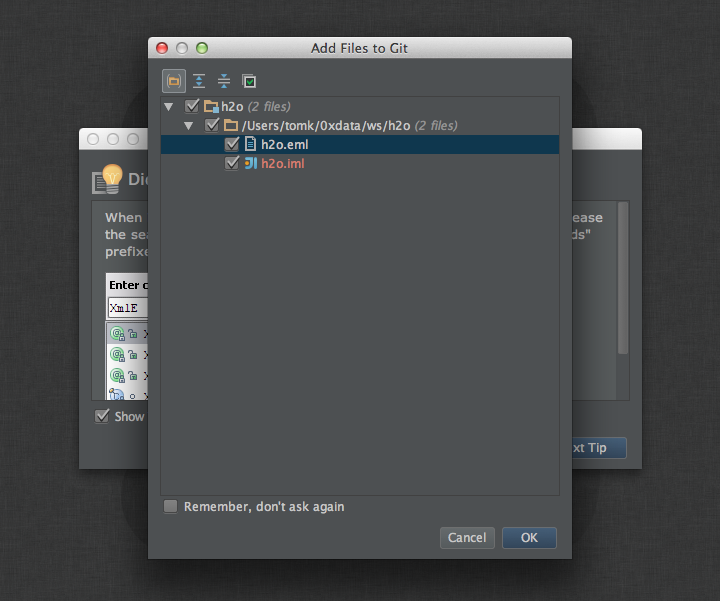
- If prompted to Add Files to Git, click Cancel.
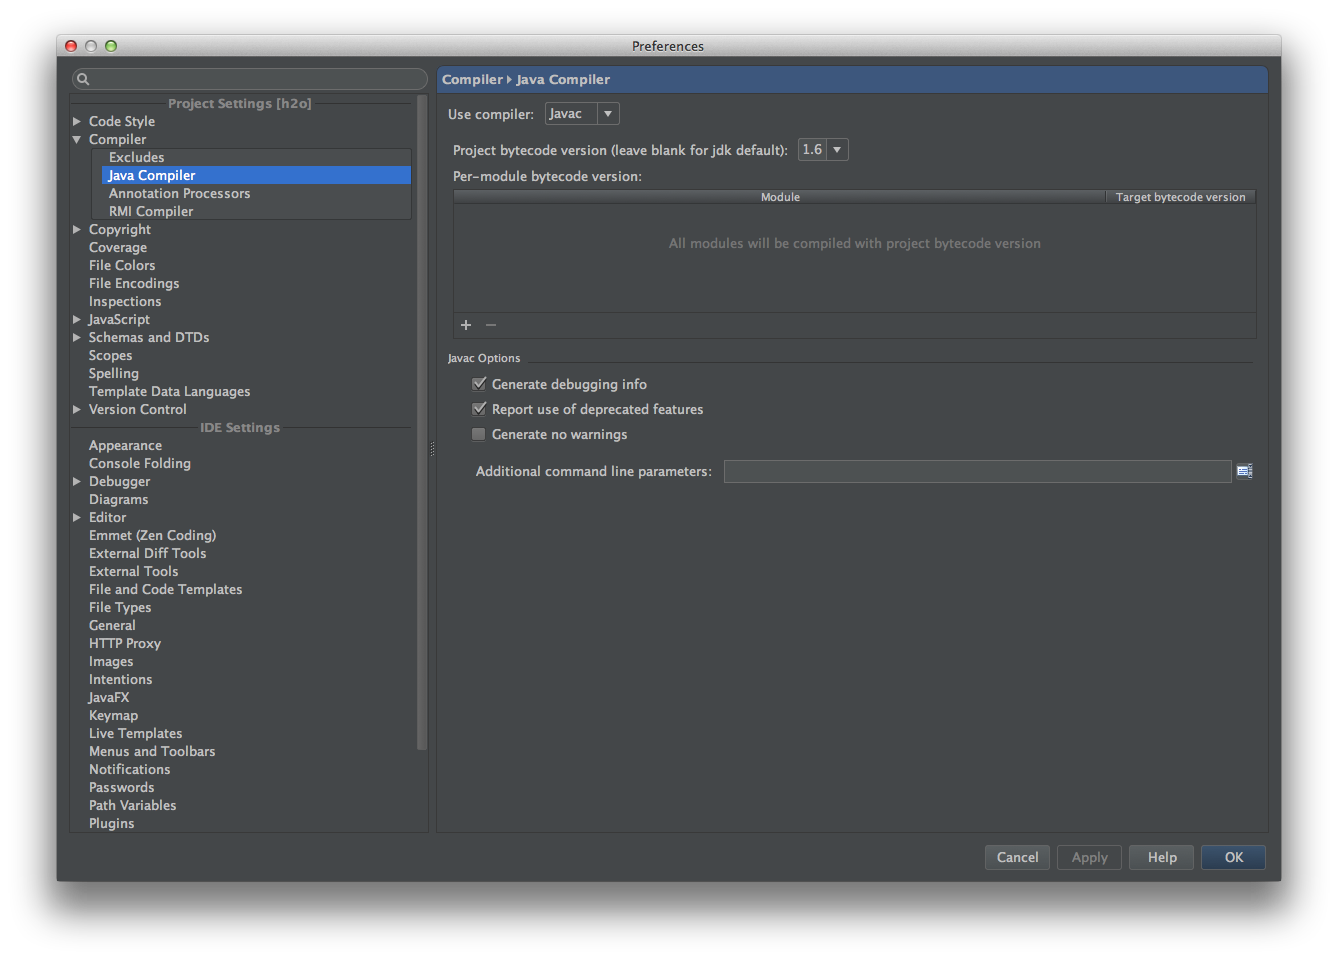
- In IntelliJ IDEA / Preferences (CMD-,) select 1.6 from the drop-down project bytecode version menu:
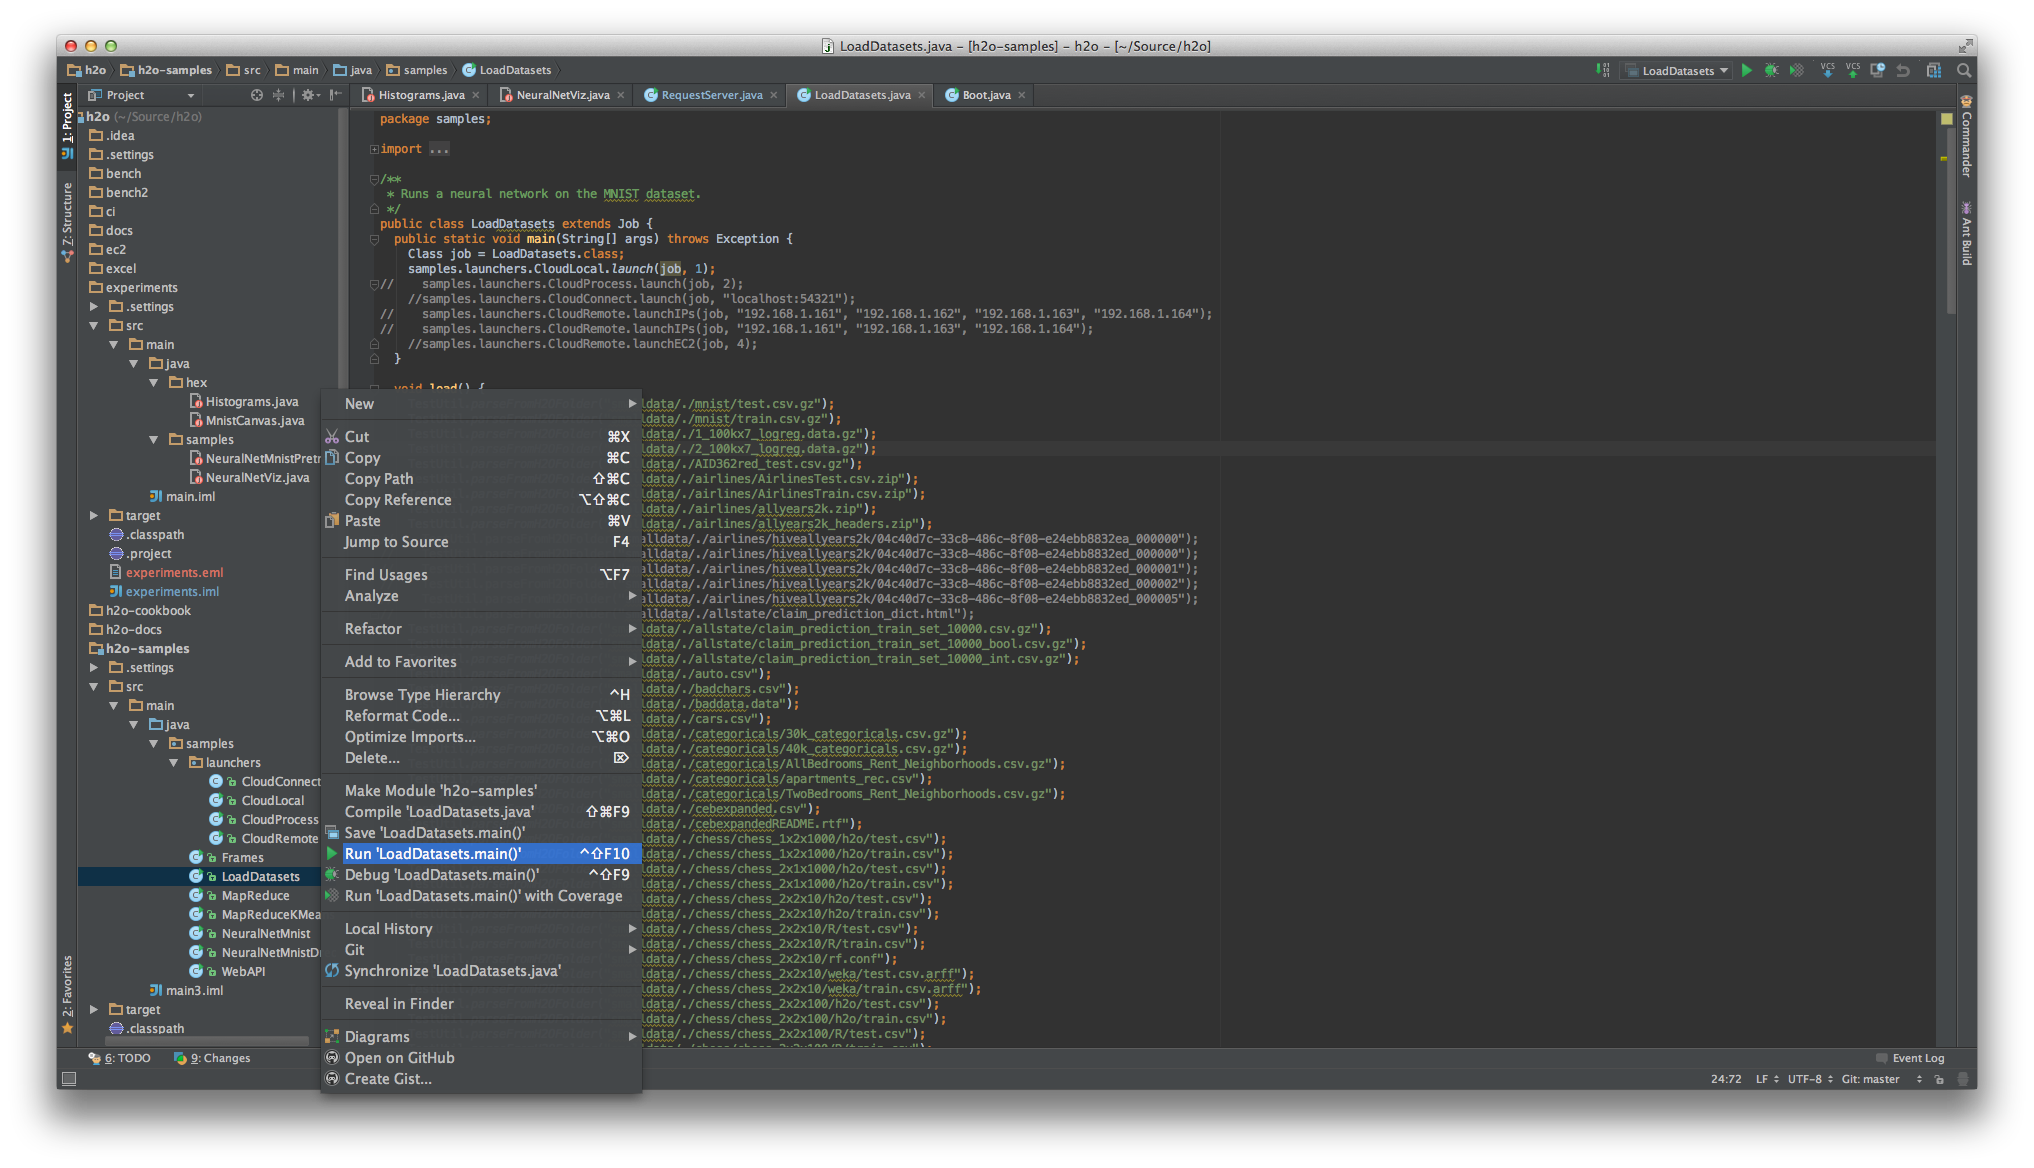
- Select a sample Java Application and right click it, then select Run.
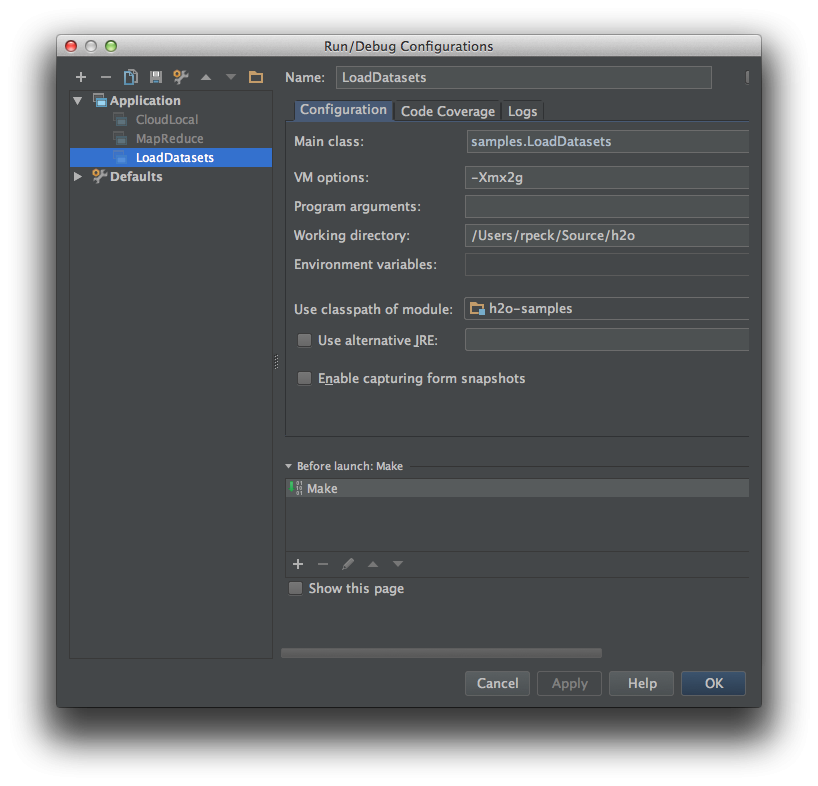
- In certain versions of IntelliJ, you may need to set the Java heap size and re-run:
- See the output of a successful run.
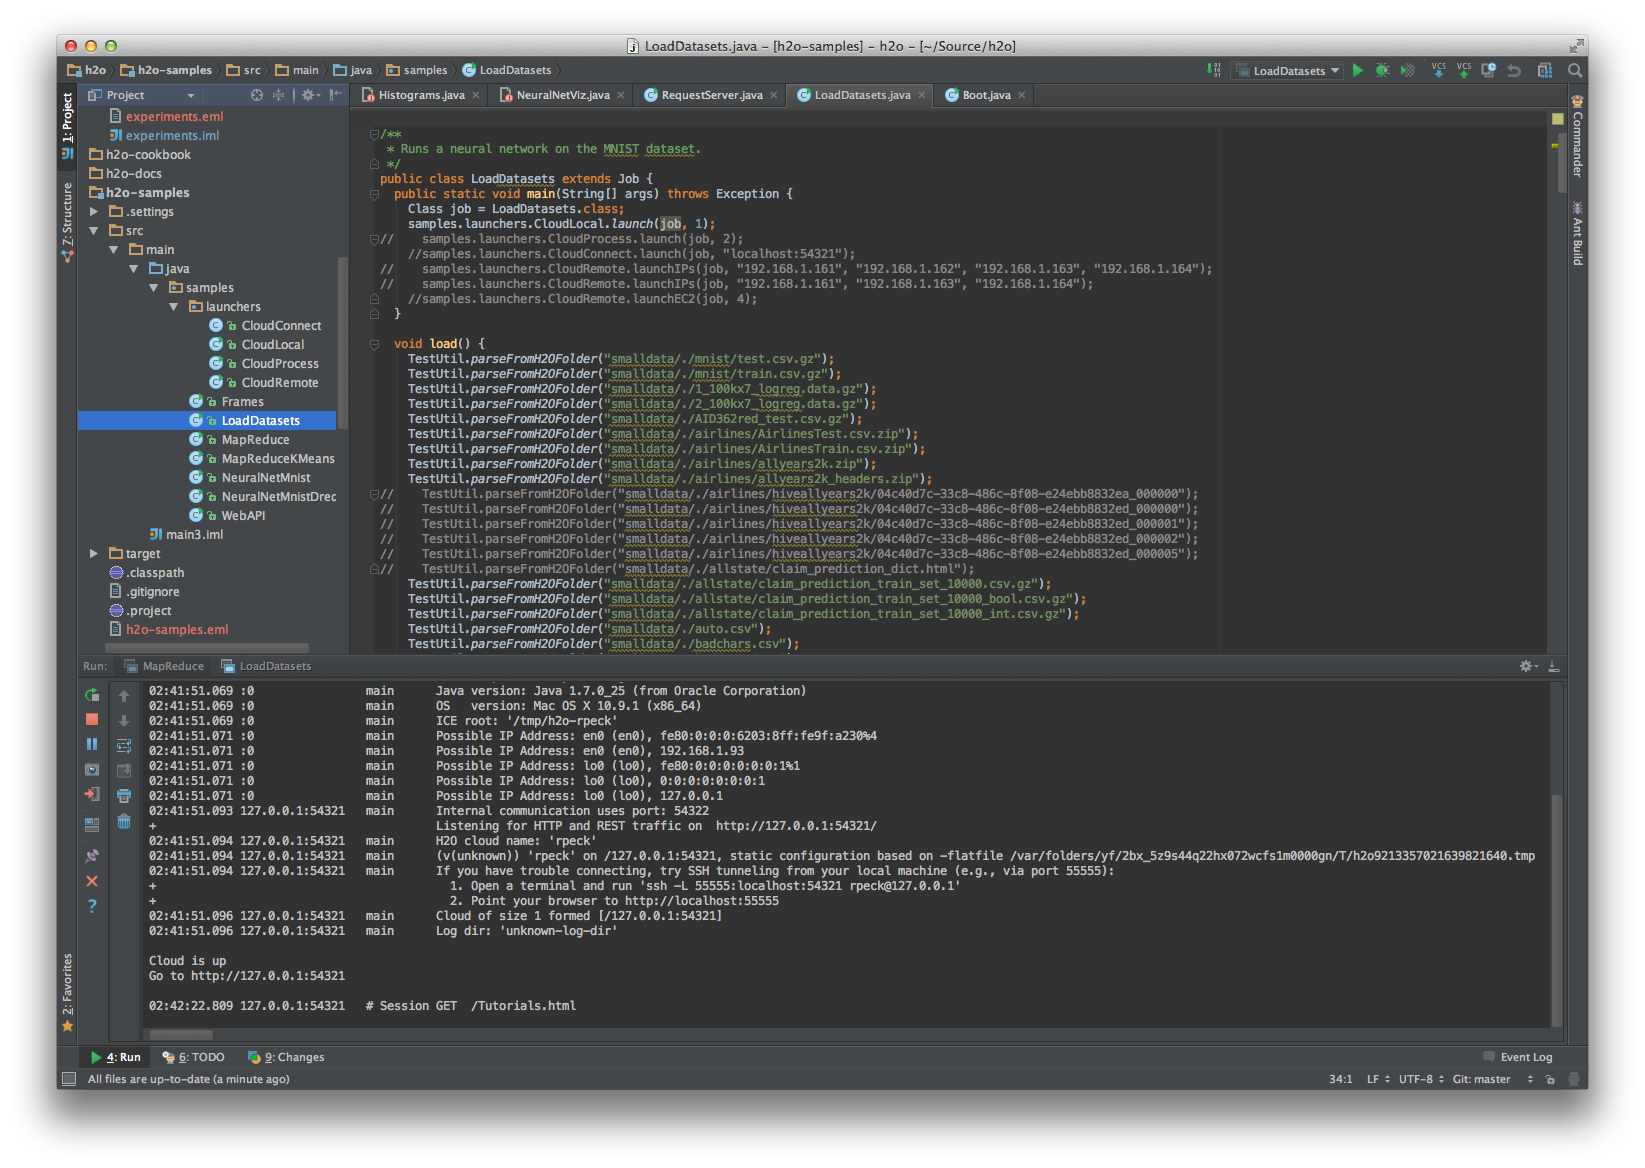
- You may connect to http://127.0.0.1:54321/ to use H2O interactively.