Using H2O with Microsoft Azure Linux Data Science VM
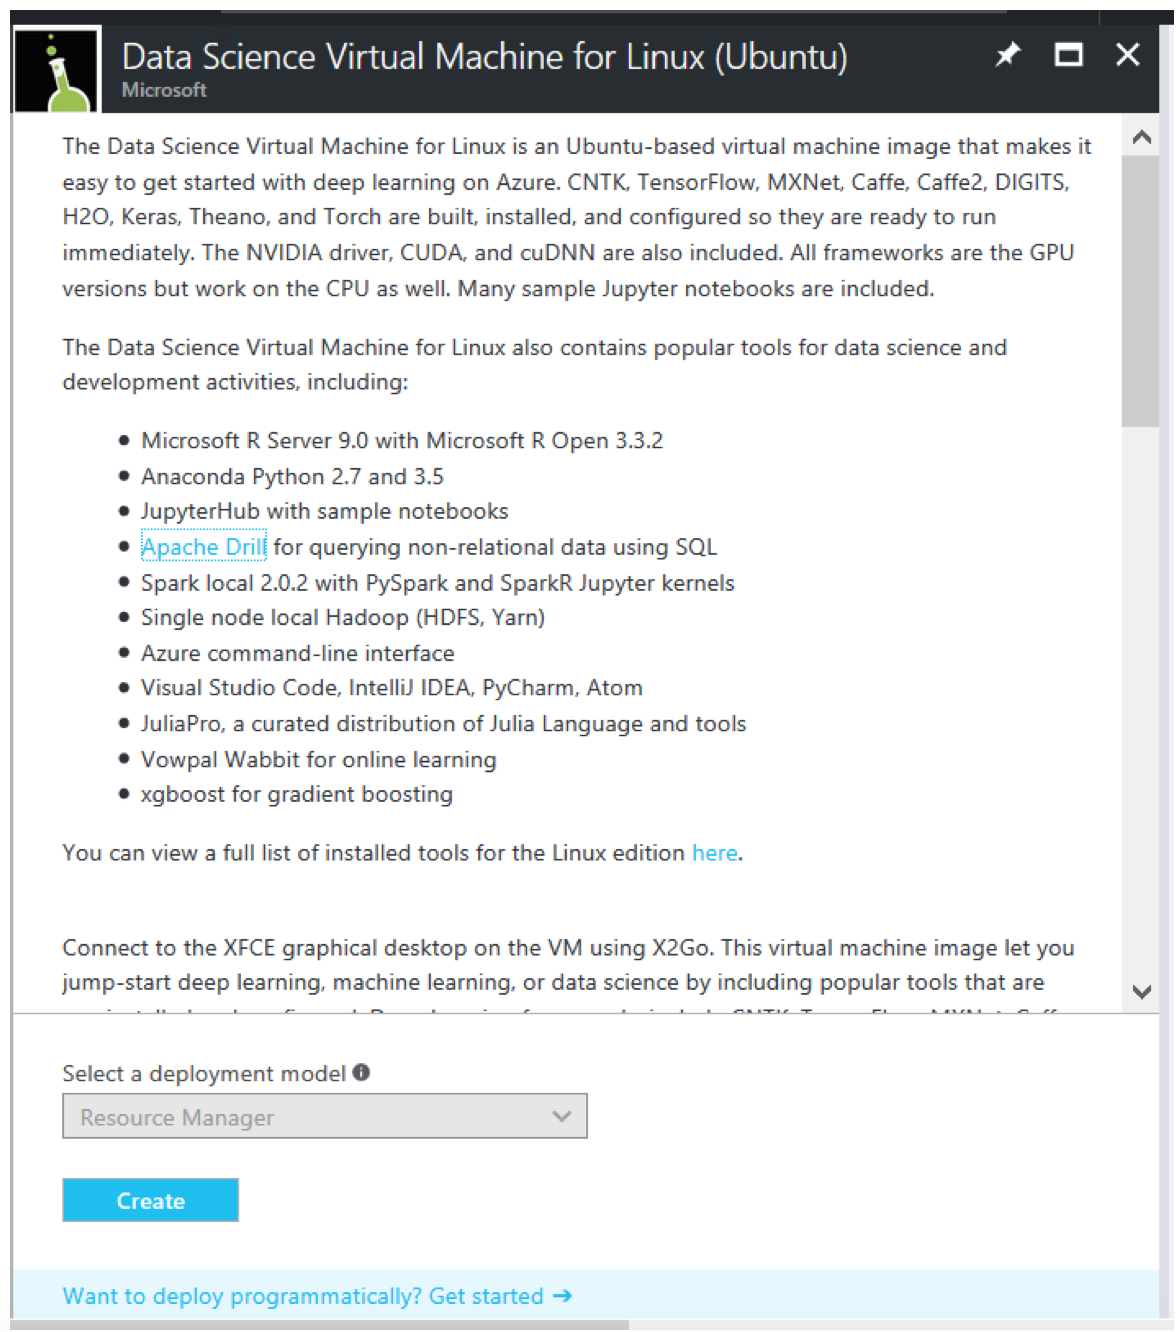
The Data Science Virtual Machine (DSVM) for Linux is an Ubuntu-based virtual machine image that makes it easy to get started with deep learning on Azure. CNTK, TensorFlow, MXNet, Caffe, Caffe2, DIGITS, H2O, Keras, Theano, and Torch are built, installed, and configured, so they are ready to run immediately. The NVIDIA driver, CUDA, and cuDNN are also included. All frameworks are the GPU versions but work on the CPU as well. Many sample Jupyter notebooks are included.
You can view a full list of installed tools for the Linux edition here.
Follow the steps below to create the H2O Artificial Intelligence VM.
- Log in to your Azure portal at https://portal.azure.com, and click the New button.
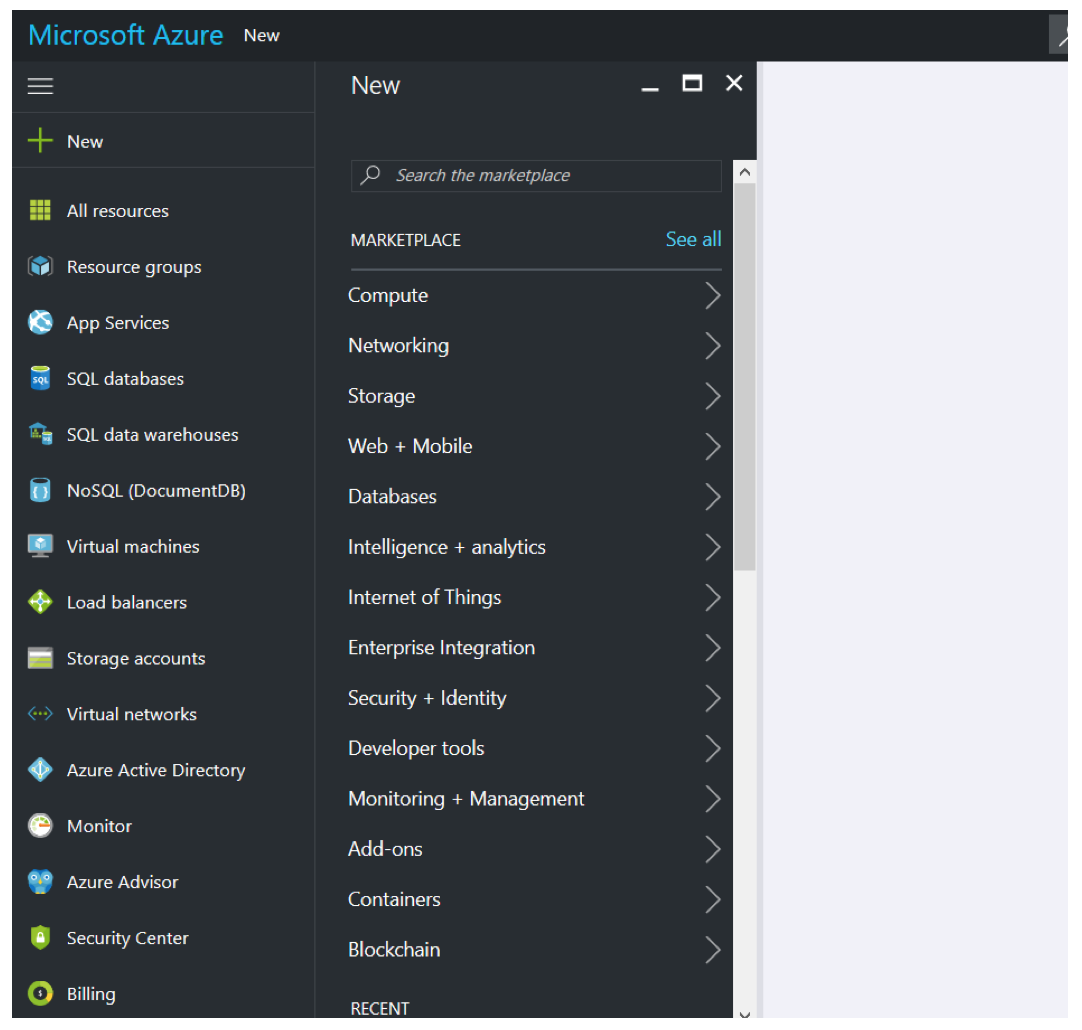
- Search in the Marketplace for “H2O”. The result will show all of the H2O offering in the Azure Marketplace. Select the Data Science Virtual Machine for Linux (Ubuntu), and click the Create button.
Follow the UI instructions and fill the Basic settings:
- Username and Password that you will be using to connect to the VM
- Subscriptions where you want to create the VM
- The new resource group name
- The location where the VM is going to be created
- Size of the VM.
Optional: For VMs with GPU, select the HDD disk option, and search for the N-Series VM. For more information, click here.
Wait for the VM Solution to be created. The expected creation time is around 10 minutes.
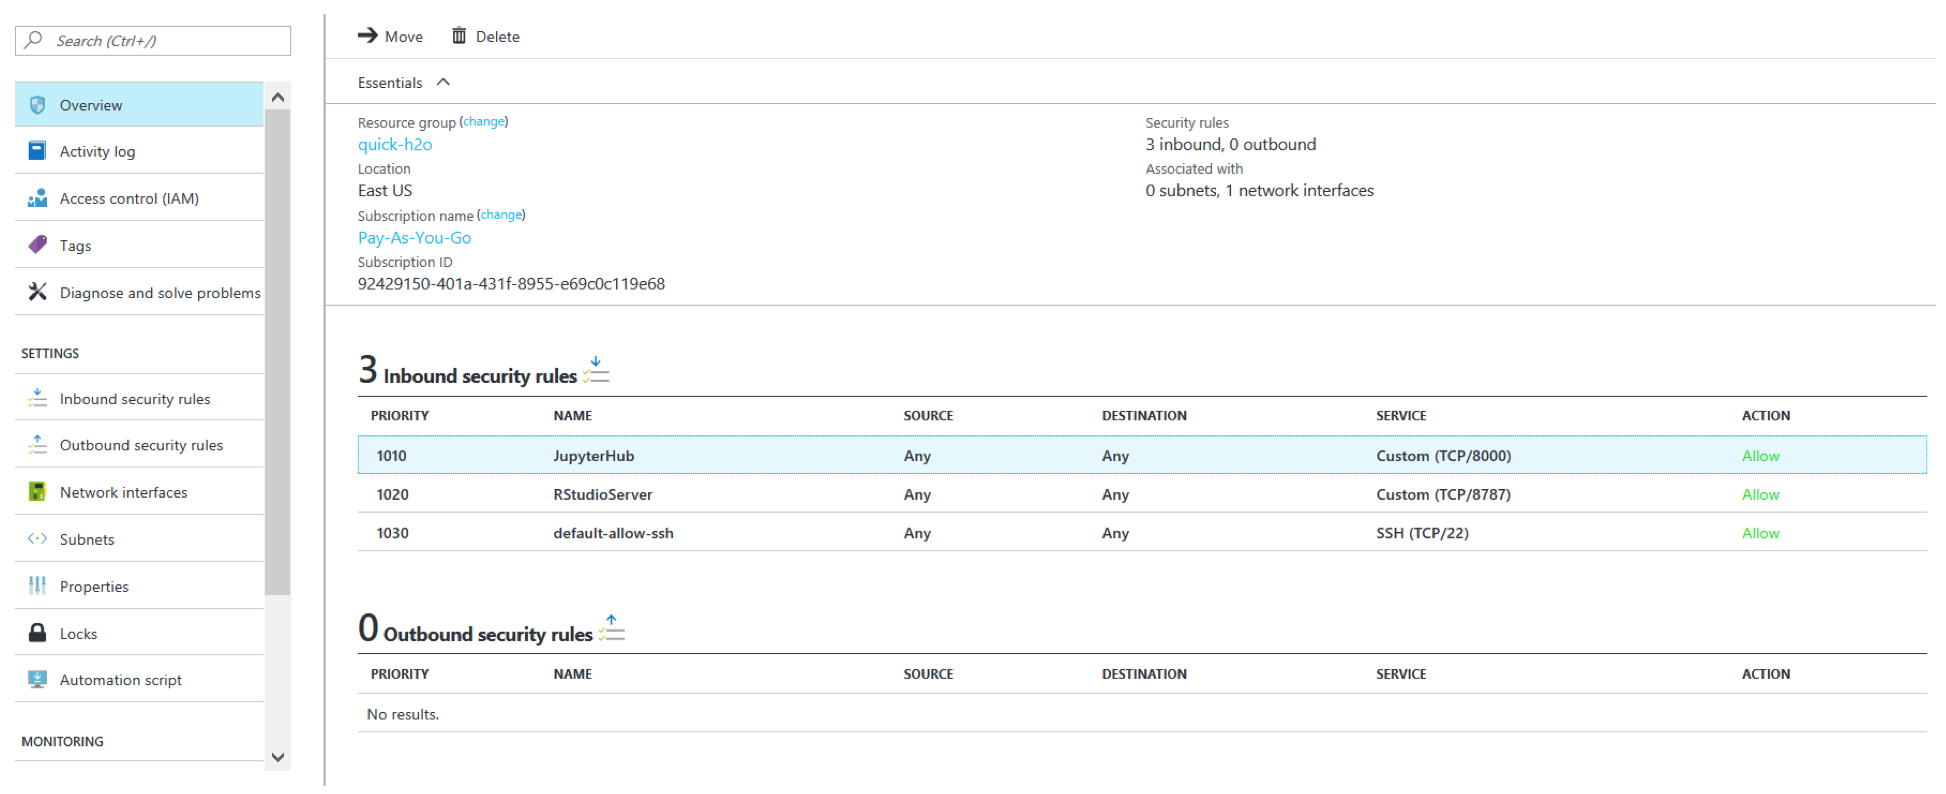
After your deployment is created, locate your network security group. Your Network Security Group is named by the default as <your VM name>-nsg. After you locate the security group, look at the inbound security rules.
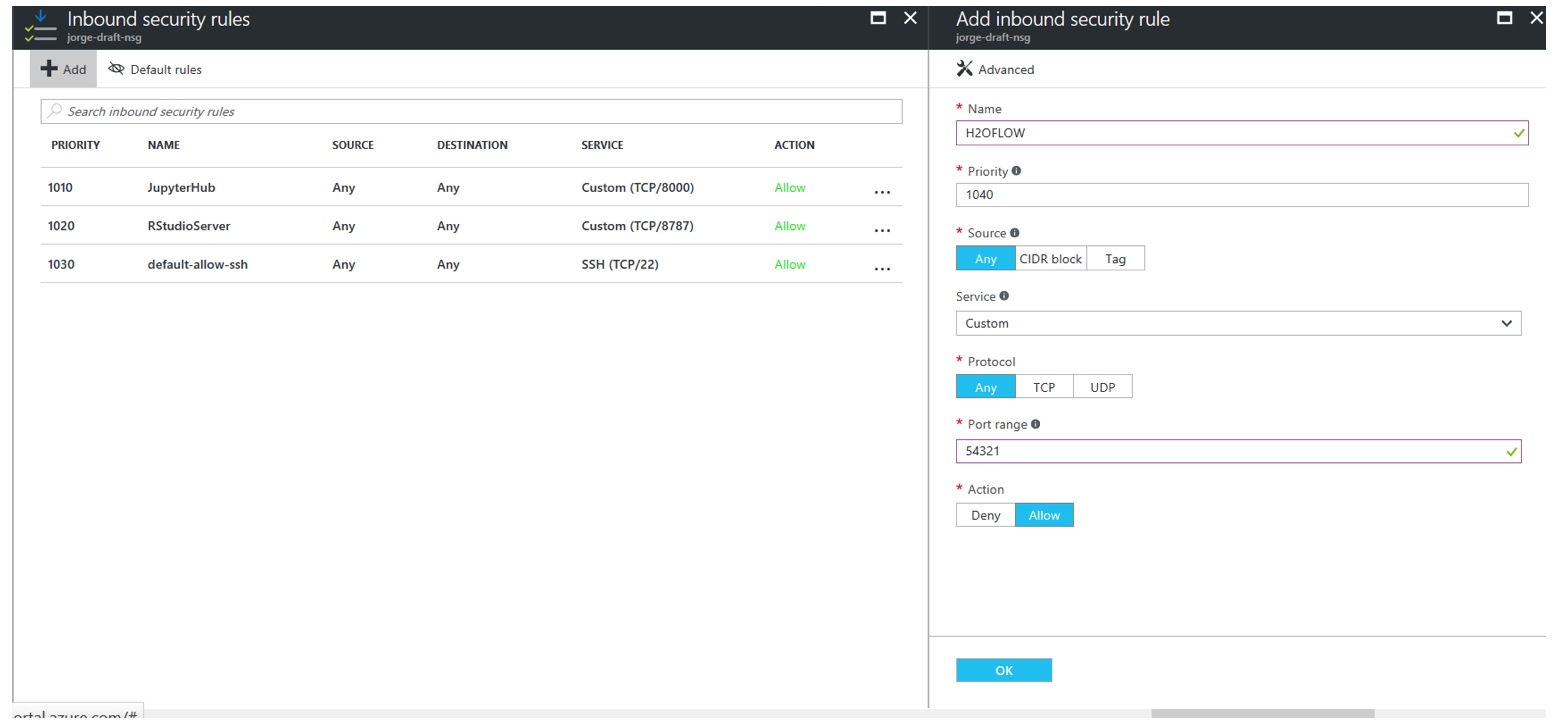
- Click Add to add a new Inbound Security Rule, and create a TCP Rule with Port Range 54321. Click OK when you are done.
- After the new Inbound Security Rule is added, then you are ready to start using your Linux DSVM with H2O. Simply connect to your Jupyter notebooks and look at the examples in the h2o > python folder to create your first H2O Model on Azure.
- Connect to Jupyter Notebook by going to https://<<VM DNS Name or IP Address>>:8000/.
- Connect to H2O Flow by going to http://<<VM DNS Name or IP Address>>:54321/.
Troubleshooting Tips
Be aware that Azure subscriptions by default allow only 20 cores. If you get a Validation error on template deployment, this might be the cause. To increase the cores limit, follow these steps: https://blogs.msdn.microsoft.com/girishp/2015/09/20/increasing-core-quota-limits-in-azure/
OS Disk by default is small (approx 30GB). In this case, you will have approximately 16GB of free space to start with. This is the same for all VM sizes. It is recommended that you add an SSD data disk by following these instructions: https://azure.microsoft.com/en-us/documentation/articles/virtual-machines-linux-classic-attach-disk/
Pick a VM size that provides RAM of at least 4x the size of your dataset. More information on Azure VM sizes is available here: https://azure.microsoft.com/en-us/pricing/details/virtual-machines/
The included examples use a
locatefunction for importing data. This function is not available to end users. For example:air_path = [_locate("smalldata/airlines/allyears2k_headers.zip")]
To retrieve the datasets, use one of the following methods instead:
- Replace this path with a pointer to a raw github file at https://raw.github.com/h2o.ai/h2o/master/... For example,
air_path="https://raw.github.com/h2oai/h2o/master/smalldata/airlines/allyears2k_headers.zip"- Use
wgetto retrieve the files.A list of the datasets used in the examples along with their locate path is available in the h2o > python > README file.