Using H2O with Amazon AWS
AWS Marketplace provides a straightforward way to deploy a cluster of VMs with H2O.
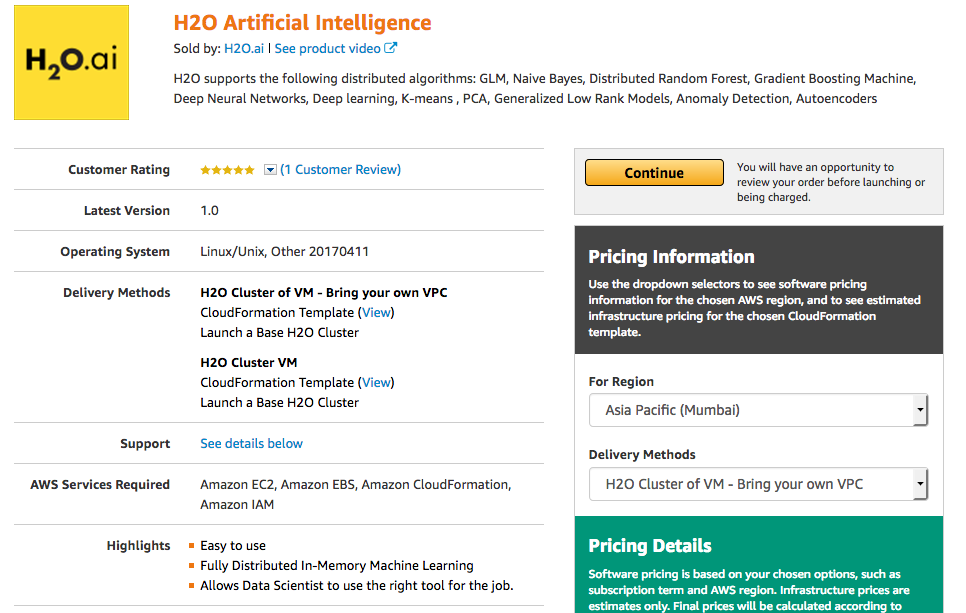
Log in to the AWS Marketplace.
In the AMI & SaaS search bar, search for H2O, and select H2O Artificial Intelligence to open H2O in the marketplace. Review the information on this page. Note that the Delivery Methods section provides two options:
- H2O Cluster of VM: All the VPC, subnets, and network security groups are created for you.
- H2O Cluster of VM - Bring your own VPC: All the networks security groups, subnets, and internet gateways are created by the user.
Click Continue after reviewing to open the Launch on EC2 page.
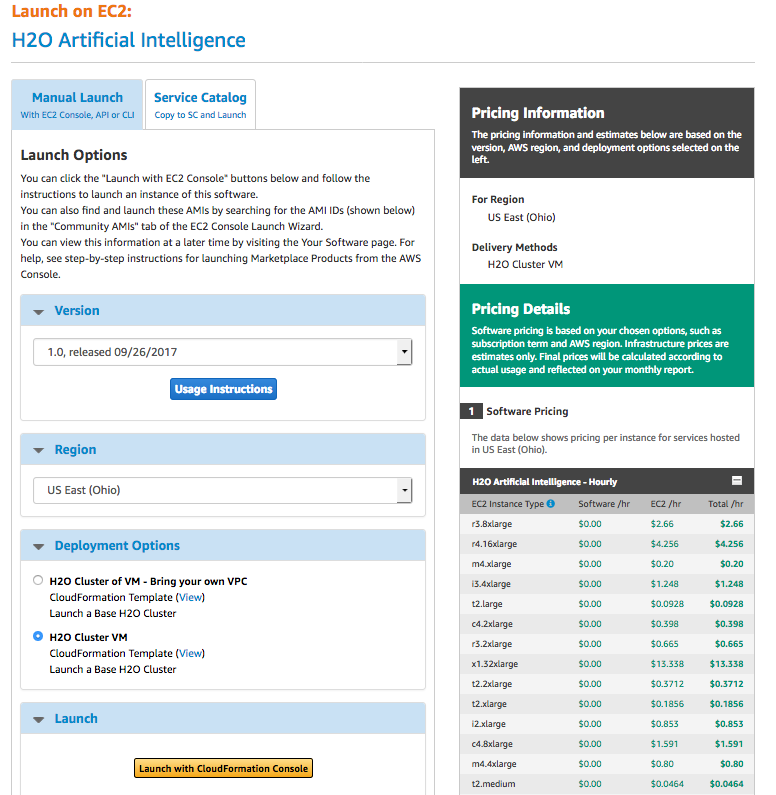
The Launch on EC2 page provides information about launch options. On the Manual Launch tab:
- Select the offering that you prefer.
- Select the region to launch.
- Specify a Deployment option.
Click Launch with CloudFormation Console to begin creating your stack.
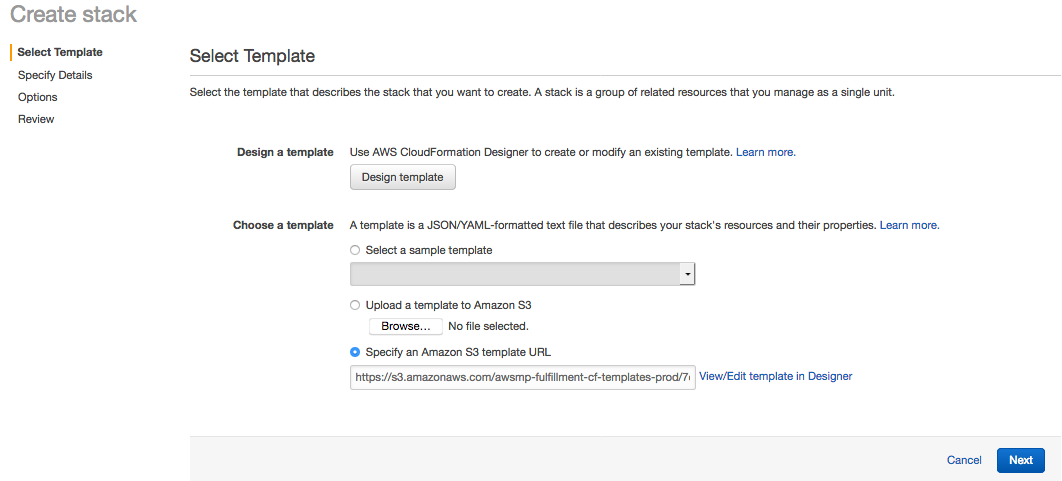
- On the Select Template page, review the template being used, follow the steps to deploy your cluster, and then click Next to continue.
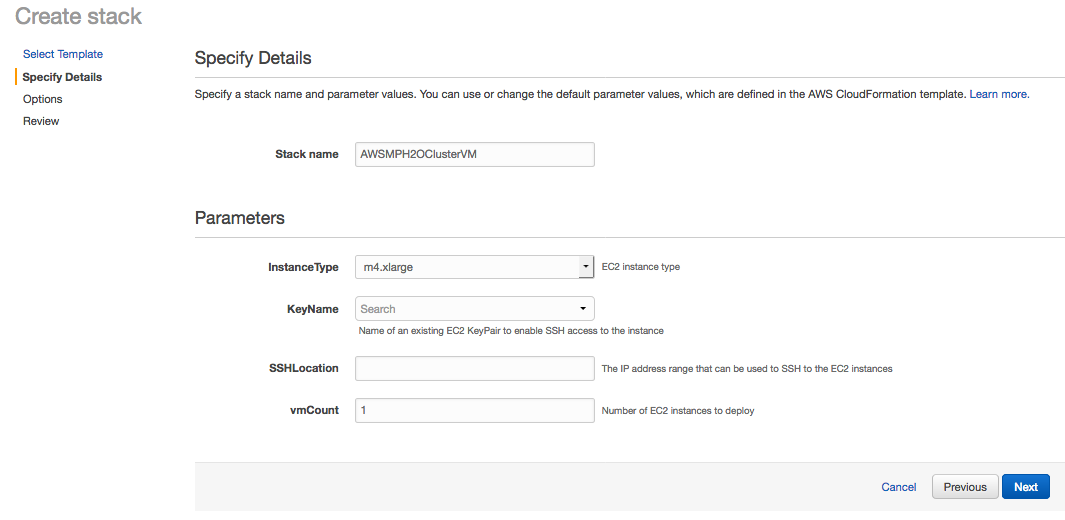
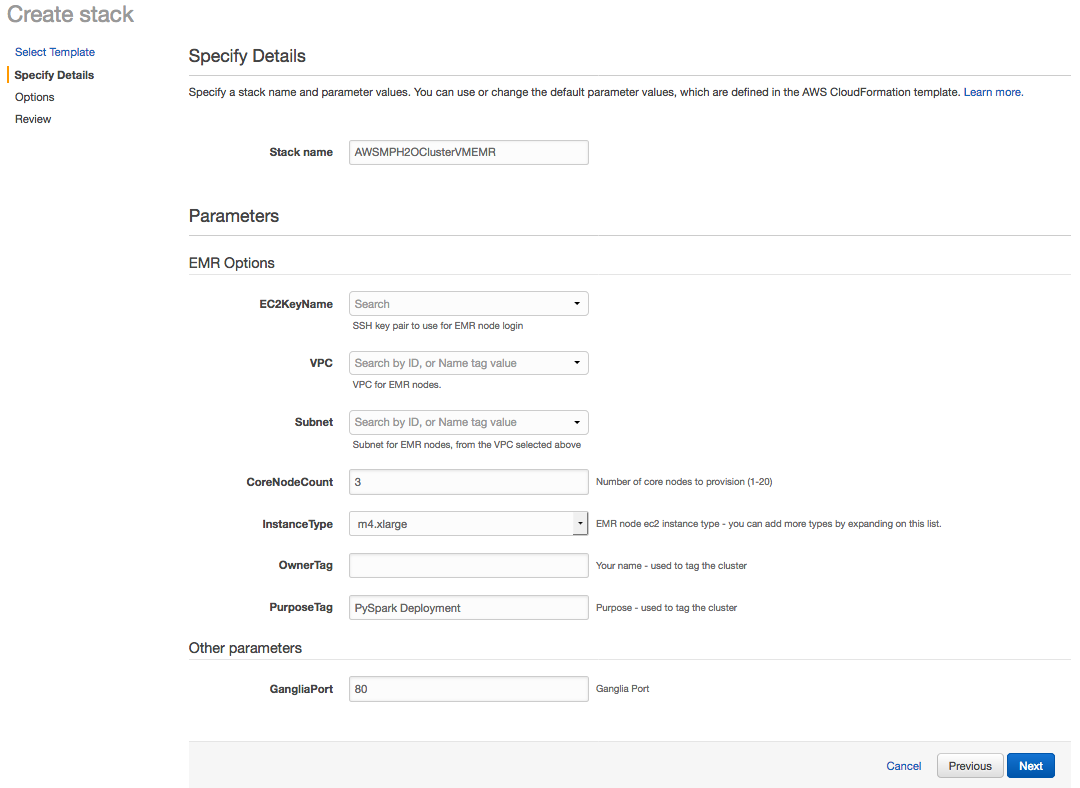
Enter any desired Stack details including the following:
- Stack name (required)
- InstanceType
- KeyName
- SSHLocation
- vmCount
Click Next to continue.
- Enter any optional tags and/or permissions on the Options page. Click Next to continue.
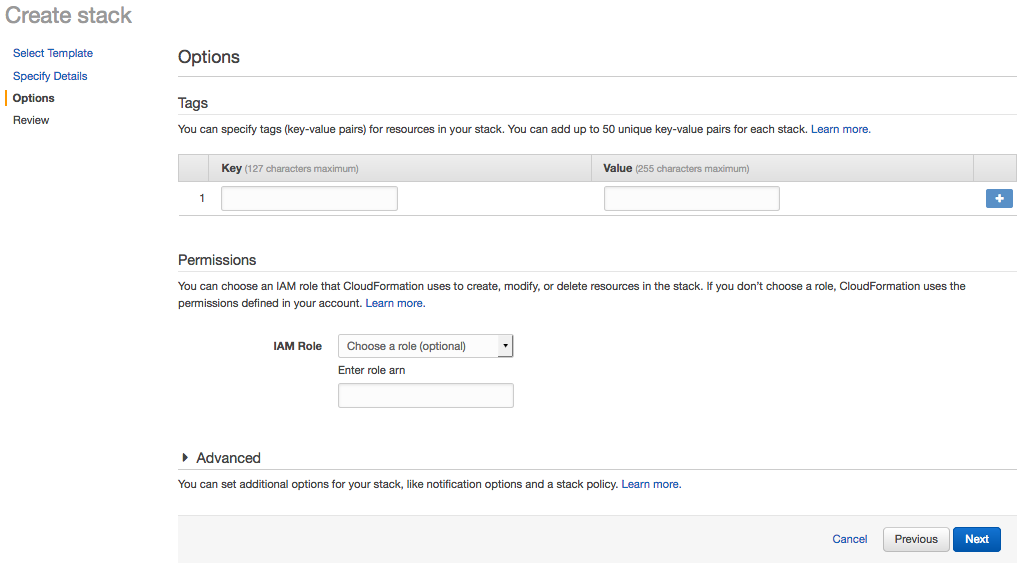
- Review the Stack configuration. Click Create to create the Stack, or click Previous to return to another page and edit any information.
After your cluster is created, you can access H2O Flow on any of the nodes by going to http://<public_dns>/:54321. Enter h2o for the username and your instance ID for the password. To connect to the operating system, use SSH and the username ubuntu.
Using H2O with Amazon EMR
To use H2O with an EMR cluster, you can use a premade H2O template.
- Perform steps 1 through 3 above. On the Select Template page, enter https://s3-us-west-2.amazonaws.com/h2o-cloud/aws-template/TemplateEMR.json in the Specify an Amazon S3 template URL field.
This template requires an install script, which is available here: https://s3-us-west-2.amazonaws.com/h2o-cloud/aws-template/install_h2o_sw.sh. This script can be added using one of the following methods:
- Download and place the script in the following s3 path: s3://h2o-cloud/aws-template/install_h2o_sw.sh
or
- Modify the s3 path to the script in the TemplateEMR.json file
Click Next when you are done.

- Note that the Specify Details page now includes an EMR Options section. Enter a name for the stack, update any options as desired, and then click Next to continue.
- Enter any optional tags and/or permissions on the Options page. Click Next to continue.
- Review the Stack configuration. Click Create to create the Stack, or click Previous to return to another page and edit any information.
After your EMR cluster is created, you can ssh into your head node. In the head node, you will find an H2O folder with Sparkling Water inside. To start any h2o jobs with Sparkling Water, follow the instructions located on the download page (https://www.h2o.ai/download/)
Is important to add the following Spark configuration to any of your EMR jobs:
--conf “spark.dynamicAllocation.enabled=false”
Using Sparkling Water with Zepplin Notebooks
To use Sparkling Water with Zeppelin notebooks on EMR perform the following steps:
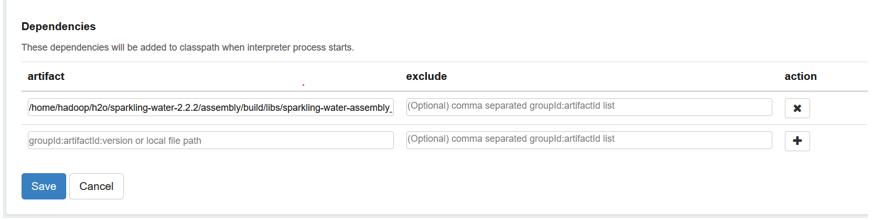
- Add the H2O driver artifact in the Spark interpreter (for example, in /home/hadoop/h2o/sparkling-water-2.2.2/assembly/build/libs/sparkling-water-assembly_2.11-2.2.2-all.jar).
- Set the spark.dynamicAllocation.enabled to false in the Spark interpreter.
- Reboot the Spark interpreter.
Upon completion, you will be able to use Sparkling Water with the Zeppelin Notebooks. To use PySparkling, just run the following line before importing the pysparkling module (replacing the Sparkling Water version with your version):
%pyspark
sc.addPyFile("/home/hadoop/h2o/sparkling-water-2.2.2/py/build/dist/h2o_pysparkling_2.2-2.2.2.zip")