Running PySparkling on Databricks Azure Cluster
Sparkling Water, PySparkling and RSparkling can be used on top of Databricks Azure Cluster. This tutorial is the PySparkling.
For Scala Sparkling Water, please visit Sparkling Water on Databricks Azure Cluster and for RSparkling, please visit RSparkling on Databricks Azure Cluster.
To start Sparkling Water H2OContext on Databricks Azure, the steps are:
Login into Microsoft Azure Portal
Create Databricks Azure Environment
In order to connect to Databricks from Azure, please make sure you have created user inside Azure Active Directory and using that user for the Databricks Login.
Upload PySparkling Library as a library from PiPy
In order to create the Python library in Databricks, go to Libraries, select Upload Python Egg or Pipy and insert
h2o_pysparkling_2.2for the latest PySparkling for Spark 2.2.The advantage of adding the library from PiPy, instead of uploading manually, is that the latest version is always selected and also, the dependencies are automatically resolved.

You can configure each cluster manually and select which libraries should be attached or you can configure the library to be attached to all future clusters. It is advised to restart the cluster in case you attached the library to already running cluster to ensure the clean environment.
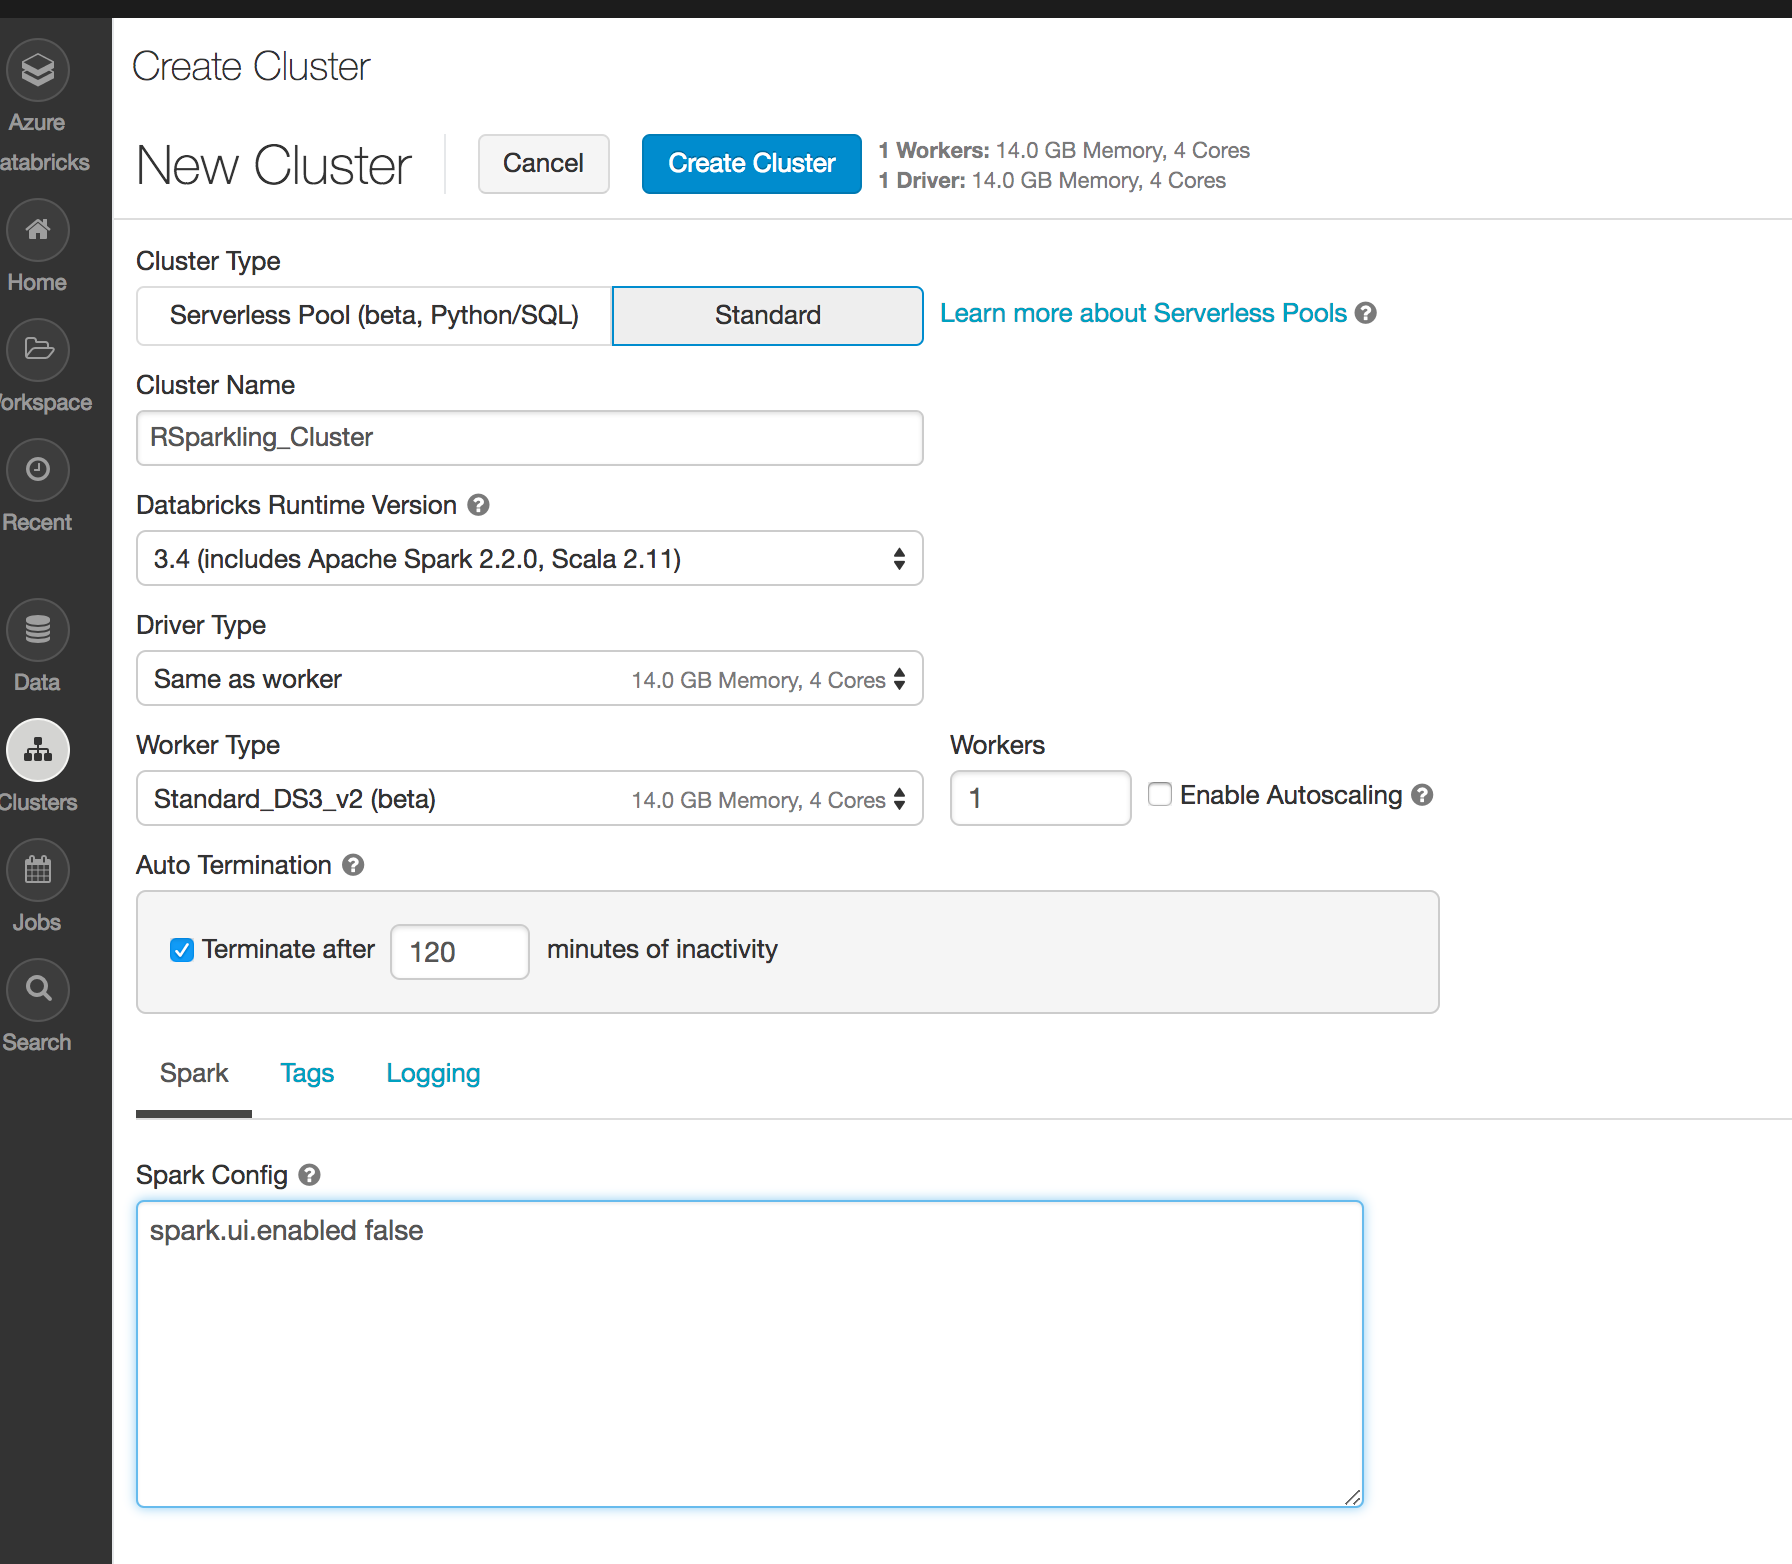
Create the cluster
- Make sure the library is attached to the cluster
- Select Spark 2.2.1
Create Python notebook and attach it to the created cluster. To start
H2OContext, the init part of the notebook should be:from pysparkling import * hc = H2OContext.getOrCreate(spark)
And voila, we should have
H2OContextrunning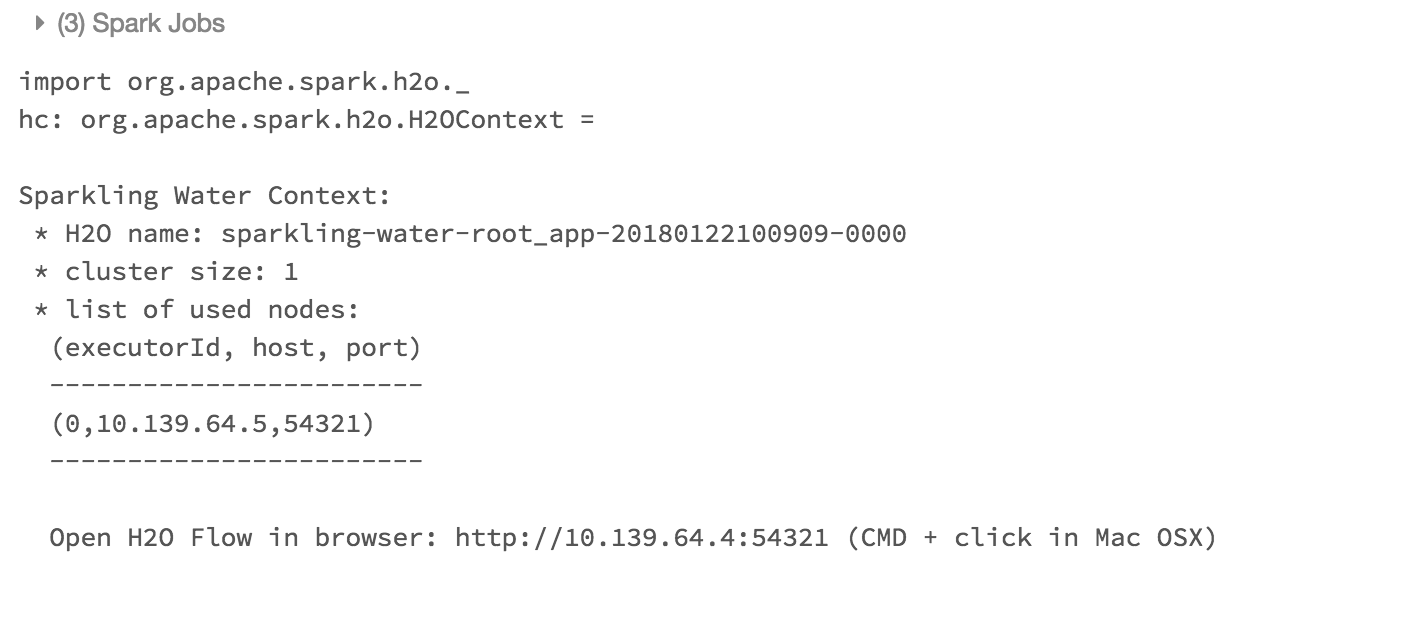
Please note that accessing H2O Flow is not currently supported on Azure Databricks.