GLM Tutorial
This tutorial walks new users through Generalized Linear Analysis (GLM) using H2O. If you have never used H2O before, refer to Getting Started From a Downloaded Zip File for additional instructions on how to run H2O.
Quick Start Video
When to Use GLM
Use GLM when the variable of interest relates to predictions or inferences about a rate, an event, or a continuous measurement, or to answer questions about how a set of environmental conditions influence the dependent variable.
For example:
- What attributes determine which customers will purchase, and which will not?
- Given a set of specific manufacturing conditions, how many units produced will fail?
- How many customers will contact help support in a given time frame?
Getting Started
This tutorial uses a publicly available data set (Abalone) that can be found at the UCI Machine Learning Repository: http://archive.ics.uci.edu/ml/machine-learning-databases/abalone/
They are composed of 4177 observations on 9 attributes. All attributes are real-valued and continuous, except for Sex and Rings (found in columns 0 and 8, respectively). Sex is categorical with 3 levels (male, female, and infant), and Rings is an integer-valued count.
Before modeling, parse data into H2O:
- From the drop-down Data menu, select Upload, and use the uploader to upload data.
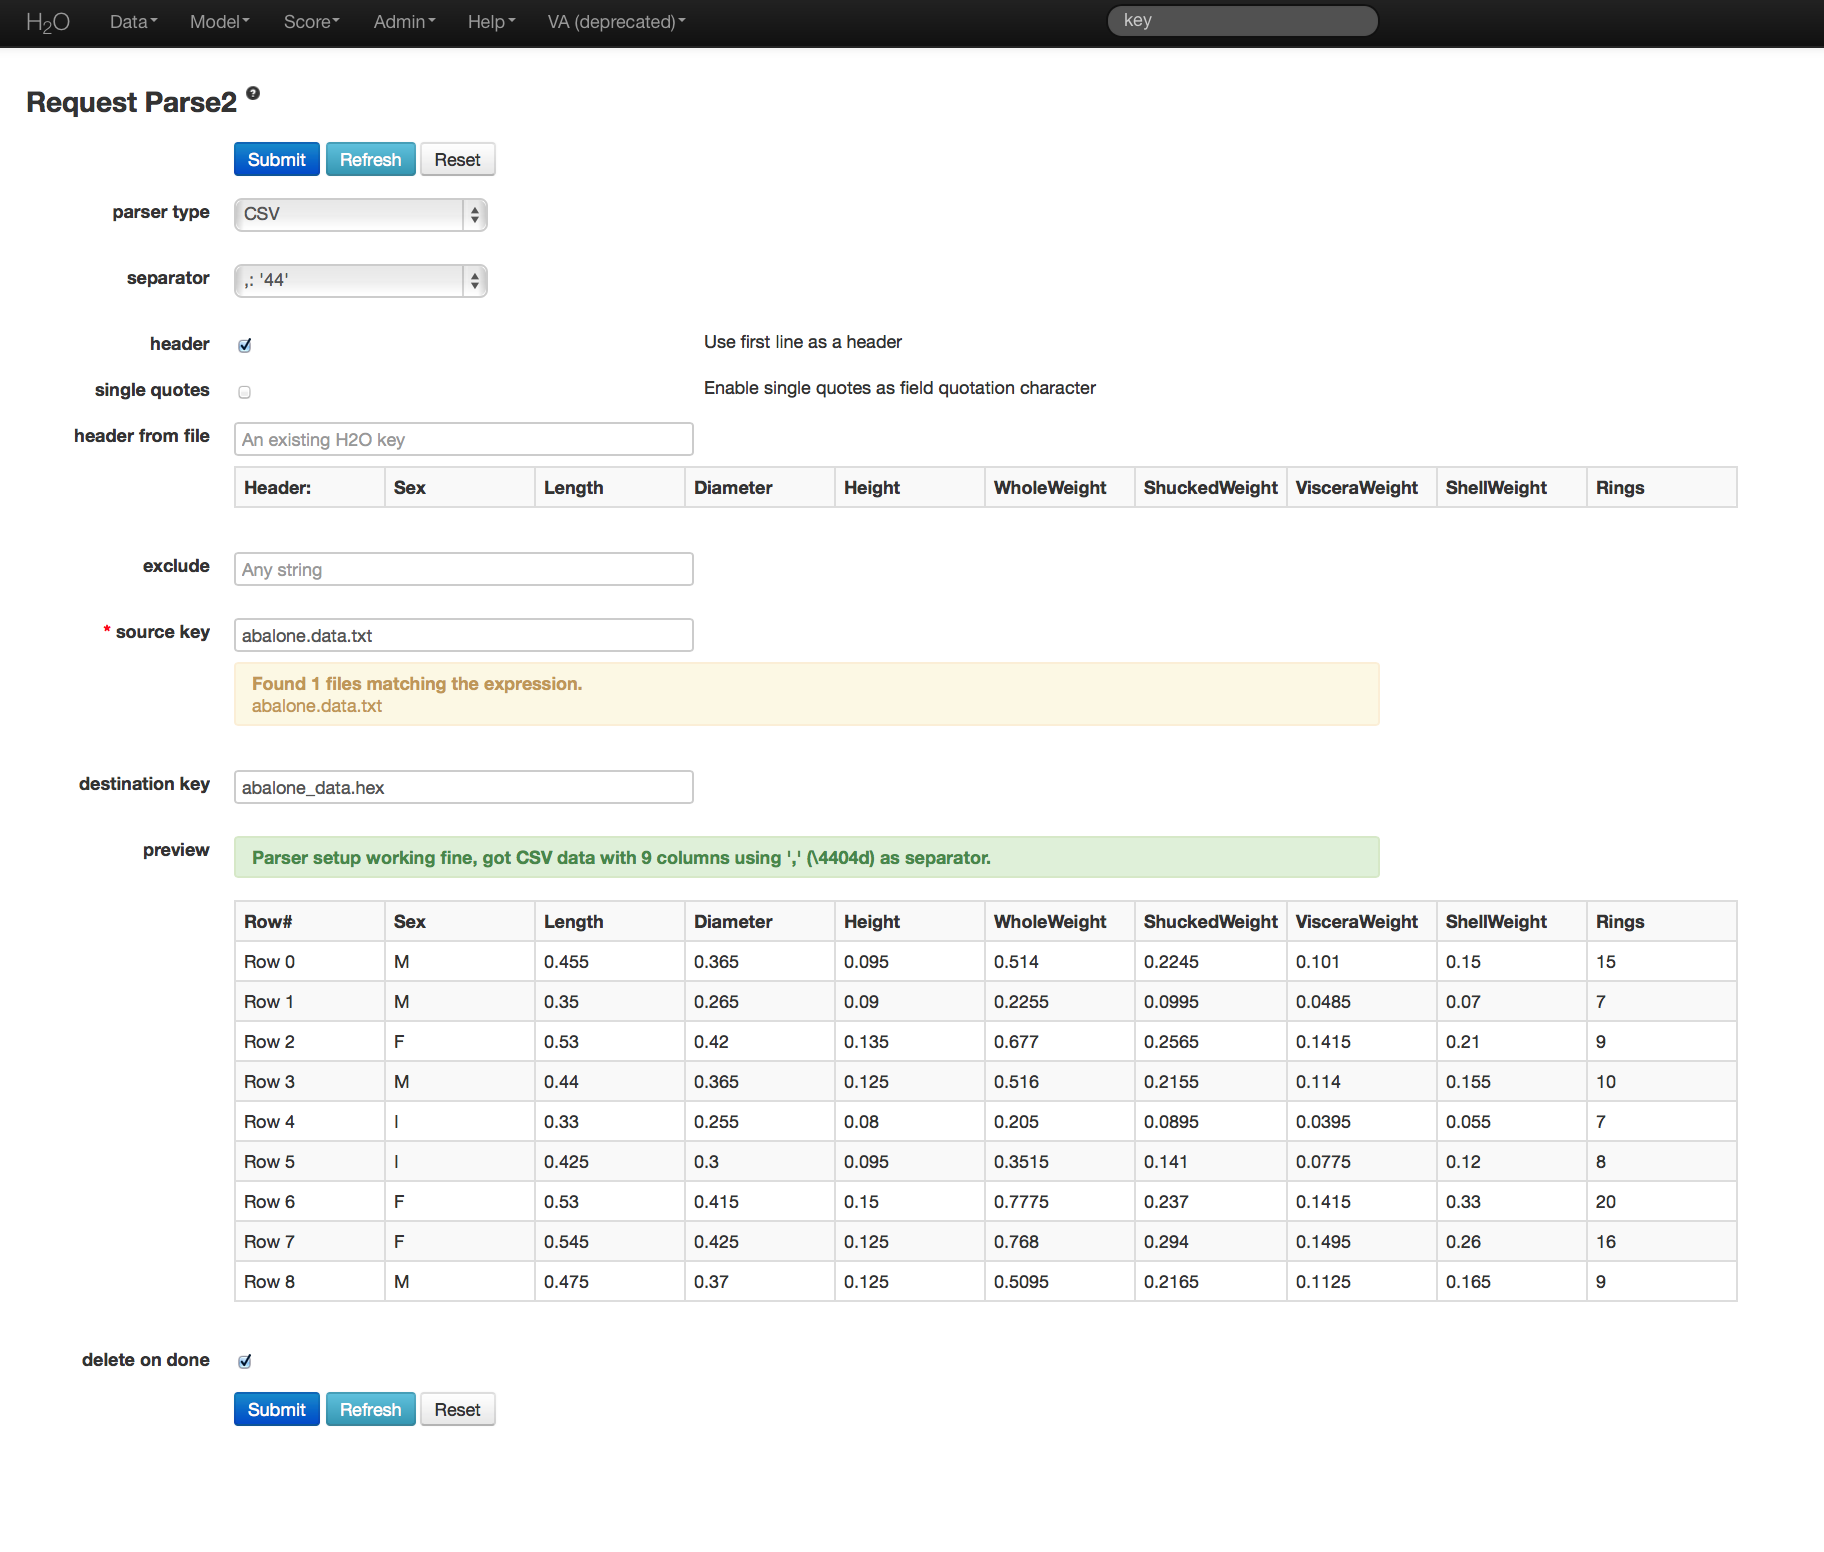
- On the “Request Parse” page that appears, check the “header” checkbox if the first row of the data set is a header. No other changes are required.
- Click Submit. Parsing data into H2O generates a .hex key of the form “data name.hex”

Building a Model
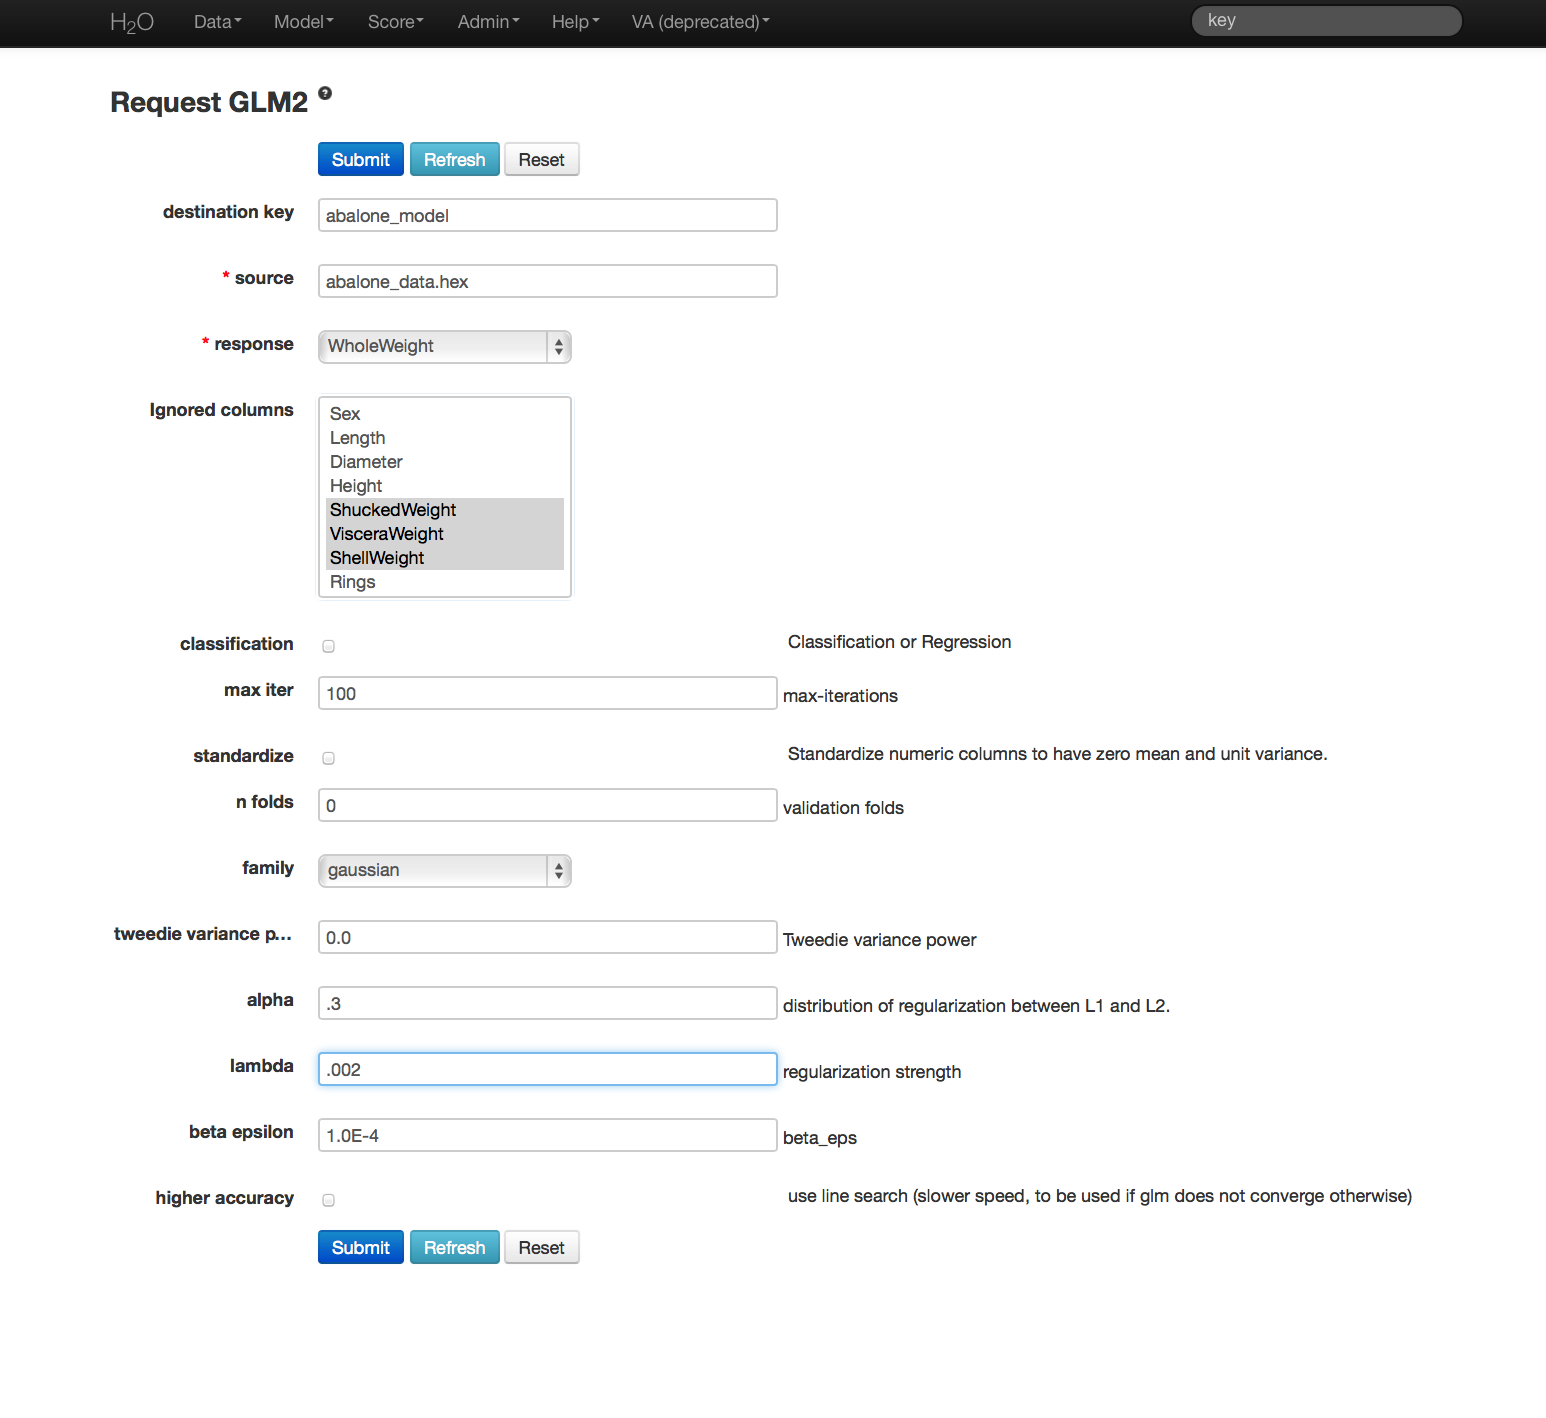
- Once data are parsed, go to the drop-down Model menu and select GLM.
- In the Source field, enter the .hex key for the data set.
- In the Response field, select the column associated with the Whole Weight variable (column 5).
- In the Ignored Columns field, select the columns to ignore.
- Do not change the default Classification and Max Iter values. Classification is used when the dependent variable is a binomial classifier. “Max iter” defines the maximum number of iterations performed by the algorithm in the event that it fails to converge.
- Confirm the Standardize option is not checked (disabled).
- Enter 0 in the Nfolds field to disable cross-validation. If the Nfolds values is greater than 0, the GLM model displays the specified number of cross-validation models.
- Specify Family to be Gaussian.
- Confirm the value for Tweedie Variance Power is zero. This option is only used for the Tweedie family of GLM models (like zero-inflated Poisson).
- Enter .3 in the Alpha field. The alpha parameter is the mixing parameter for the L1 and L2 penalty.
- Enter .002 for the Lambda value.
- Click Submit.

GLM Results
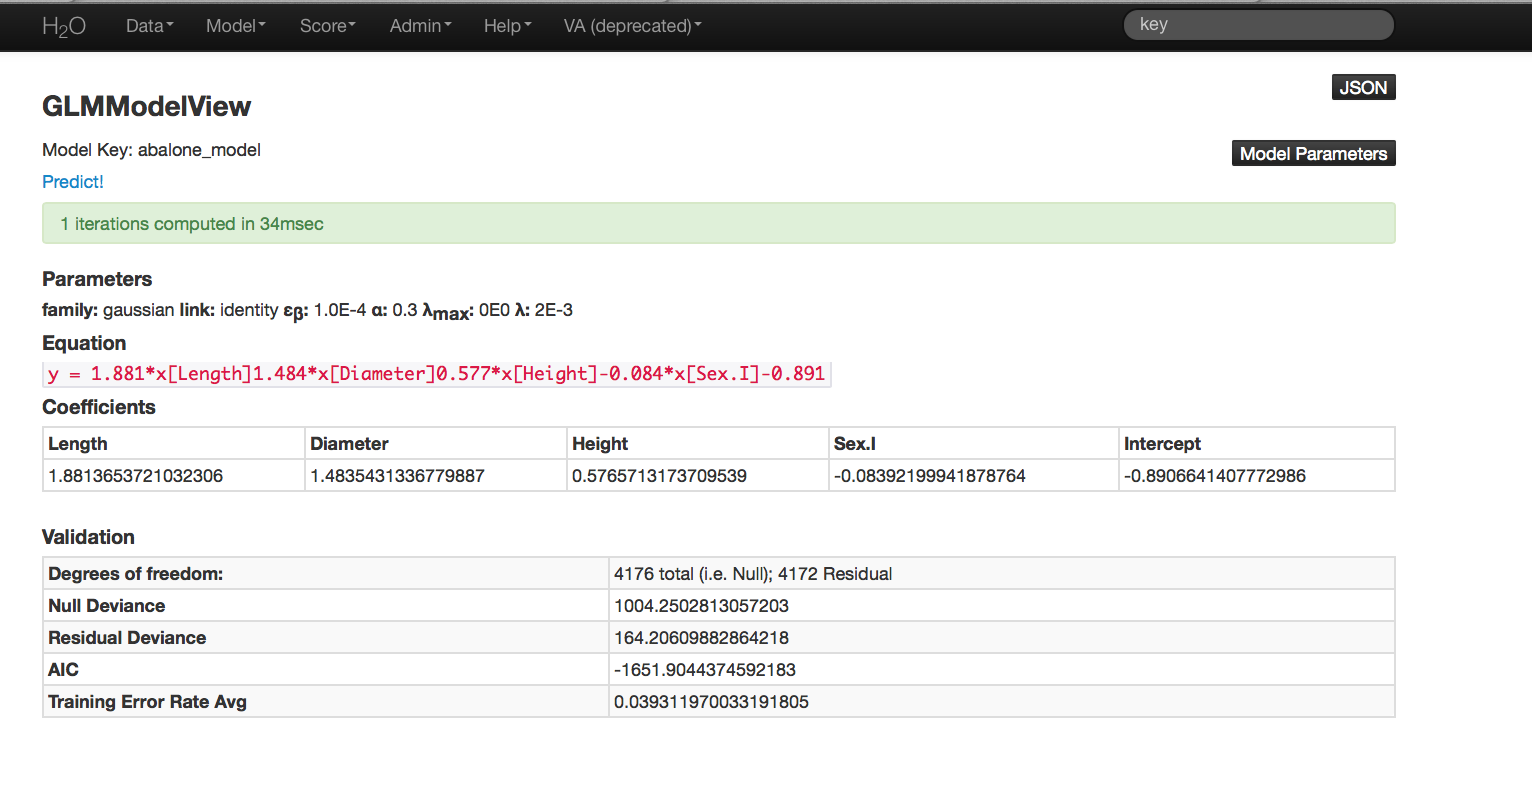
The GLM output includes coefficients, AIC, and error rate, as well as normalized coefficients when standardization is requested. An equation of the specified model displays in red at the top of the GLM results page.

Validating on Testing Set
Models can be applied to holdout testing sets or prediction data, provided that the data are in the same format as the data originally used to generate the GLM model.
Note: If the models used for prediction have lambda search enabled, ~100 submodels are generated. To score a specific lambda value, select a lambda from the lambda row in the “Parameters” table at the top of the page. By default, H2O selects the “best” lambda value, which appears in bold in the lambda row in the “Parameters” table.
If you select a different lambda value, the page refreshes and the selected lambda appears in bold. If you click the Predict! link at the top of the page, the selected lambda is used for the prediction. However, if you select Score > Predict, the default “best” lambda value is used, not the selected value. To store the selected lambda value as the “best” value, click the Set lambda_value to current value! link.
- Click the Predict! link at the top of the GLM results page, or go to the drop-down Score menu and select Predict.
- If you clicked the Predict! link on the GLM results page, the model .hex key is entered automatically. Otherwise, enter the model .hex key in the “model” field.
- In the “data” field, enter the .hex key of the test data set and click Submit.
- For regression models, click the Score menu and select Confusion Matrix. For binomial models, click the Score menu and select AUC.
- In the “actual” field, enter the .hex key for the test data set.
- From the drop-down “vactual” list, select the column to use for prediction.
- In the “predict” field, enter the .hex key for the prediction generated in the first step.
- From the drop-down “vpredict” list, select predict.
- Click Submit.
Validation results report the same model statistics that were generated when the model was originally specified.
