EC2 Instances & S3 Storage
Tested on Redhat AMI, Amazon Linux AMI, and Ubuntu AMI
To use the Amazon Web Services (AWS) S3 storage solution, you will need
to pass your S3 access credentials to H2O. This will allow you to access
your data on S3 when importing data frames with path prefixes
s3n://....
To use the Minio Cloud Storage, you will need to pass an endpoint in addition to access credentials.
For security reasons, we recommend writing a script to read the access credentials that are stored in a separate file. This will not only keep your credentials from propagating to other locations, but it will also make it easier to change the credential information later.
Note: You can only specify one S3 endpoint. This means you can either read data from AWS S3 or Minio S3, not from both.
AWS Standalone Instance
When running H2O in standalone mode using the simple Java launch command, we can pass in the S3 credentials in two ways.
You can pass in credentials in standalone mode by creating a
core-site.xmlfile and pass it in with the flag-hdfs_config. For an examplecore-site.xmlfile, refer to Core-site.xml.- Edit the properties in the core-site.xml file to include your Access Key ID and Access Key as shown in the following example:
<property>
        <name>fs.s3n.awsAccessKeyId</name>
        <value>[AWS SECRET KEY]</value>
</property>

<property>
        <name>fs.s3n.awsSecretAccessKey</name>
        <value>[AWS SECRET ACCESS KEY]</value>
</property>
- Launch with the configuration file
core-site.xmlby entering the following in the command line:
java -jar h2o.jar -hdfs_config core-site.xml
- Import the data using
importFilewith the S3 URL path: s3n://bucket/path/to/file.csv. You can pass the Minio Access Key and Secret Access Key in an S3N URL in Flow, R, or Python (whereAWS_ACCESS_KEYrepresents your user name, andAWS_SECRET_KEYrepresents your password).
- To import the data from the Flow API:
importFiles [ "s3n://<AWS_ACCESS_KEY>:<AWS_SECRET_KEY>@bucket/path/to/file.csv" ]
- To import the data from the R API:
h2o.importFile(path = "s3n://<AWS_ACCESS_KEY>:<AWS_SECRET_KEY>@bucket/path/to/file.csv")
- To import the data from the Python API:
h2o.import_file(path = "s3n://<AWS_ACCESS_KEY>:<AWS_SECRET_KEY>@bucket/path/to/file.csv")
AWS Multi-Node Instance
Python and the boto Python library are required to launch a multi-node instance of H2O on EC2. Confirm these dependencies are installed before proceeding.
For more information, refer to the H2O EC2 repo.
Build a cluster of EC2 instances by running the following commands on the host that can access the nodes using a public DNS name.
- Edit h2o-cluster-launch-instances.py to include your SSH key name and security group name, as well as any other environment-specific variables.
./h2o-cluster-launch-instances.py
./h2o-cluster-distribute-h2o.sh
—OR–
./h2o-cluster-launch-instances.py ./h2o-cluster-download-h2o.shNote: The second method may be faster than the first because download pulls from S3.
- Distribute the credentials using
./h2o-cluster-distribute-aws-credentials.sh.
Note: If you are running H2O using an IAM role, it is not necessary to distribute the AWS credentials to all the nodes in the cluster. The latest version of H2O can access the temporary access key.
Caution: Distributing the AWS credentials copies the Amazon AWS_ACCESS_KEY_ID and AWS_SECRET_ACCESS_KEY to the instances to enable S3 and S3N access. Use caution when adding your security keys to the cloud.
- Start H2O by launching one H2O node per EC2 instance:
./h2o-cluster-start-h2o.shWait 60 seconds after entering the command before entering it on the next node.
- In your internet browser, substitute any of the public DNS node addresses for IP_ADDRESS in the following example:
http://IP_ADDRESS:54321
- To start H2O:
./h2o-cluster-start-h2o.sh- To stop H2O:
./h2o-cluster-stop-h2o.sh- To shut down the cluster, use your Amazon AWS console to shut down the cluster manually.
Note: To successfully import data, the data must reside in the same location on all nodes.
Minio Instance
Minio Cloud Storage is an alternative to Amazon AWS S3. When using a Minio server, the following additional parameters are specified in the Java launch command:
endpoint: Specifies a minio server instance (including address and port). This overrides the existing endpoint, which is currently hardcoded to be AWS S3.enable.path.style: Specifies to override the default S3 behavior to expose every bucket as a full DNS enabled path. Note that this is a Minio recommendation.
- Edit the properties in the
core-site.xmlfile to include your these new parameters as well as the Access Key ID and Access Key. Refer to the following example:
<property>
  <name>Dsys.ai.h2o.persist.s3.endPoint</name>
  <value>example.minio.io:9000</value>
</property>
<property>
  <name>Dsys.ai.h2o.persist.s3.enable.path.style</name>
  <value>true</value>
</property>
<property>
  <name>Daws.AccessKeyId</name>
  <value>[MINIO SECRET KEY]</value>
</property>

<property>
  <name>Daws.SecretAccessKey</name>
  <value>[MINIO SECRET ACCESS KEY]</value>
</property>
- Launch with the configuration file
core-site.xmlby entering the following in the command line:
java -jar h2o.jar -hdfs_config core-site.xml
- Import the data using
importFilewith the Minio S3 url path: s3n://bucket/path/to/file.csv. You can pass the AWS Access Key and Secret Access Key in an S3N URL in Flow, R, or Python (whereMINIO_ACCESS_KEYrepresents your user name, andMINIO_SECRET_KEYrepresents your password).
- To import the data from the Flow API:
importFiles [ "s3n://<MINIO_ACCESS_KEY>:<MINIO_SECRET_KEY>@bucket/path/to/file.csv" ]
- To import the data from the R API:
h2o.importFile(path = "s3n://<MINIO_ACCESS_KEY>:<MINIO_SECRET_KEY>@bucket/path/to/file.csv")
- To import the data from the Python API:
h2o.import_file(path = "s3n://<MINIO_ACCESS_KEY>:<MINIO_SECRET_KEY>@bucket/path/to/file.csv")
Core-site.xml Example
The following is an example core-site.xml file:
<?xml version="1.0"?>
<?xml-stylesheet type="text/xsl" href="configuration.xsl"?>

<!-- Put site-specific property overrides in this file. -->

<configuration>

    <!--
    <property>
    <name>fs.default.name</name>
    <value>s3n://<your s3 bucket></value>
    </property>
    -->

    <property>
        <name>fs.s3n.awsAccessKeyId</name>
        <value>insert access key here</value>
    </property>

    <property>
        <name>fs.s3n.awsSecretAccessKey</name>
        <value>insert secret key here</value>
    </property>
    </configuration>
Launching H2O
Note: Before launching H2O on an EC2 cluster, verify that ports
54321 and 54322 are both accessible by TCP and UDP.
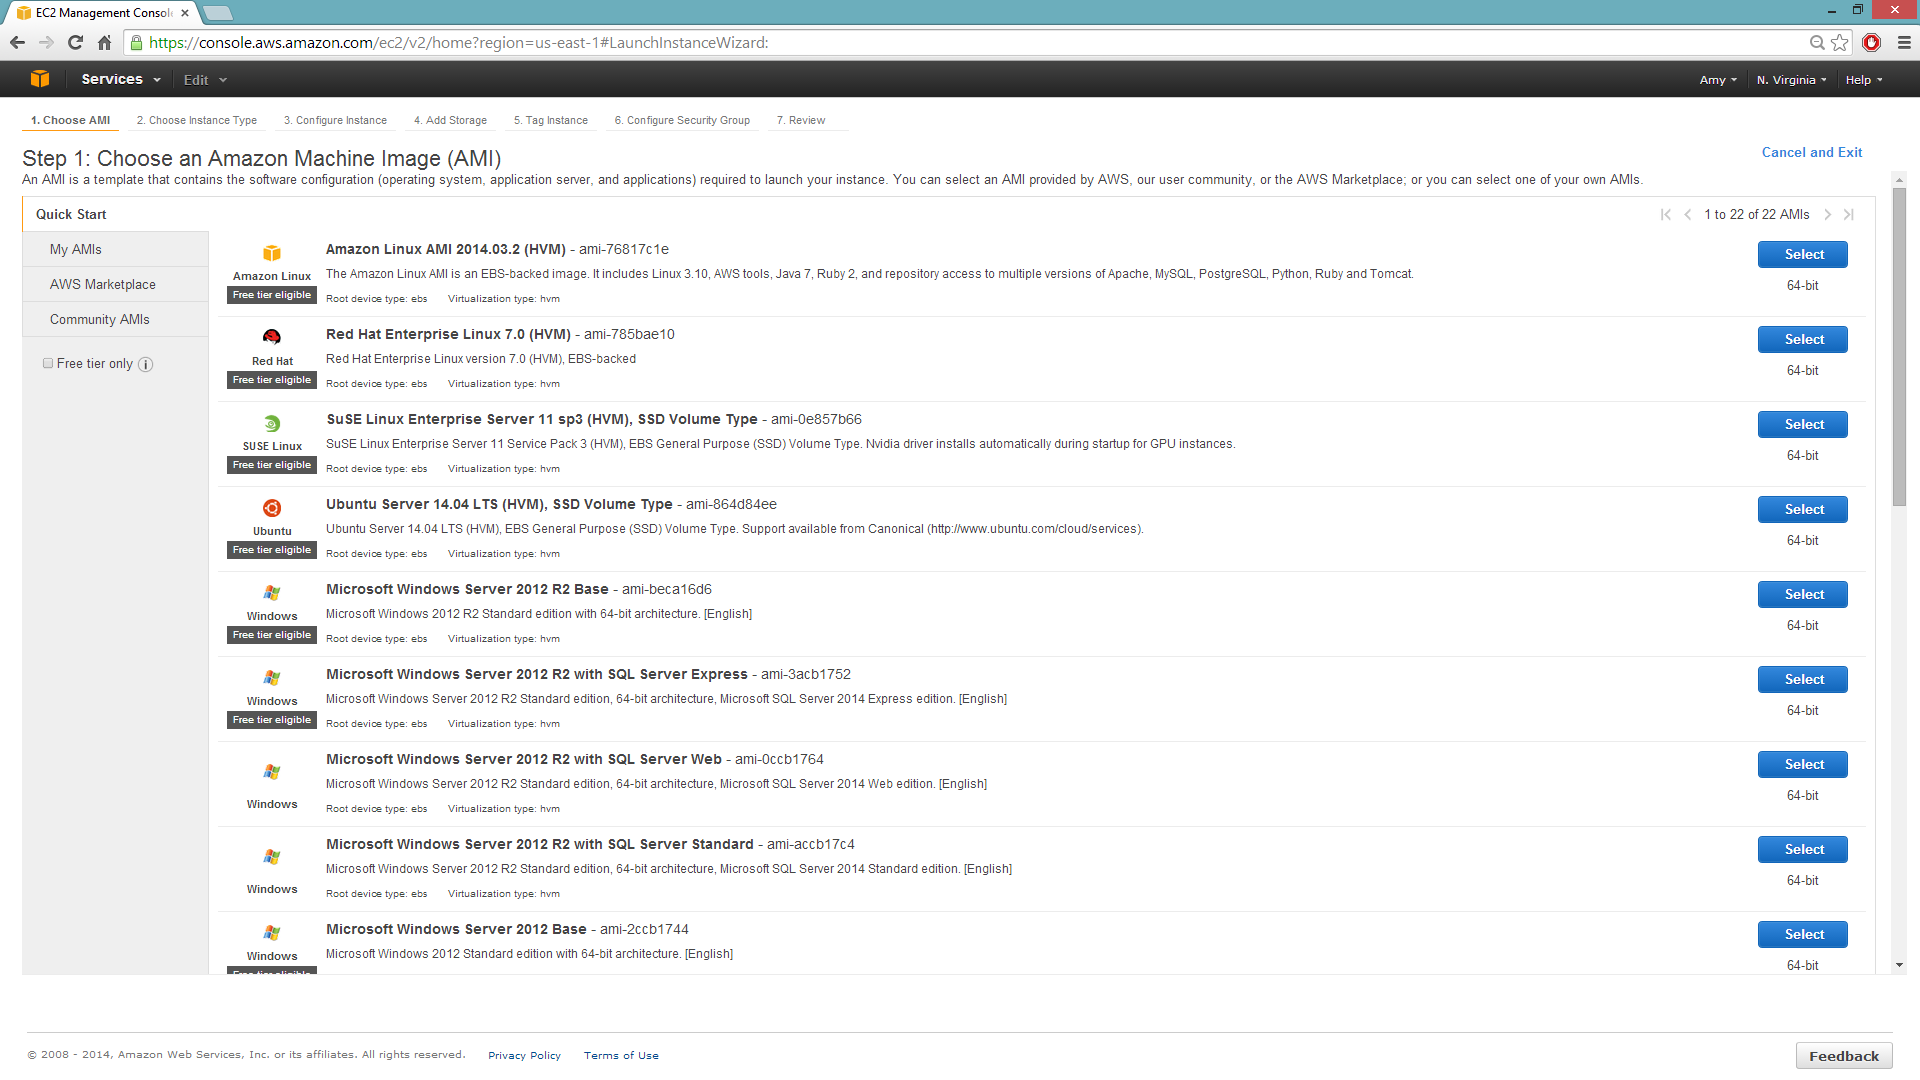
Selecting the Operating System and Virtualization Type
Select your operating system and the virtualization type of the prebuilt AMI on Amazon. If you are using Windows, you will need to use a hardware-assisted virtual machine (HVM). If you are using Linux, you can choose between para-virtualization (PV) and HVM. These selections determine the type of instances you can launch.
For more information about virtualization types, refer to Amazon.
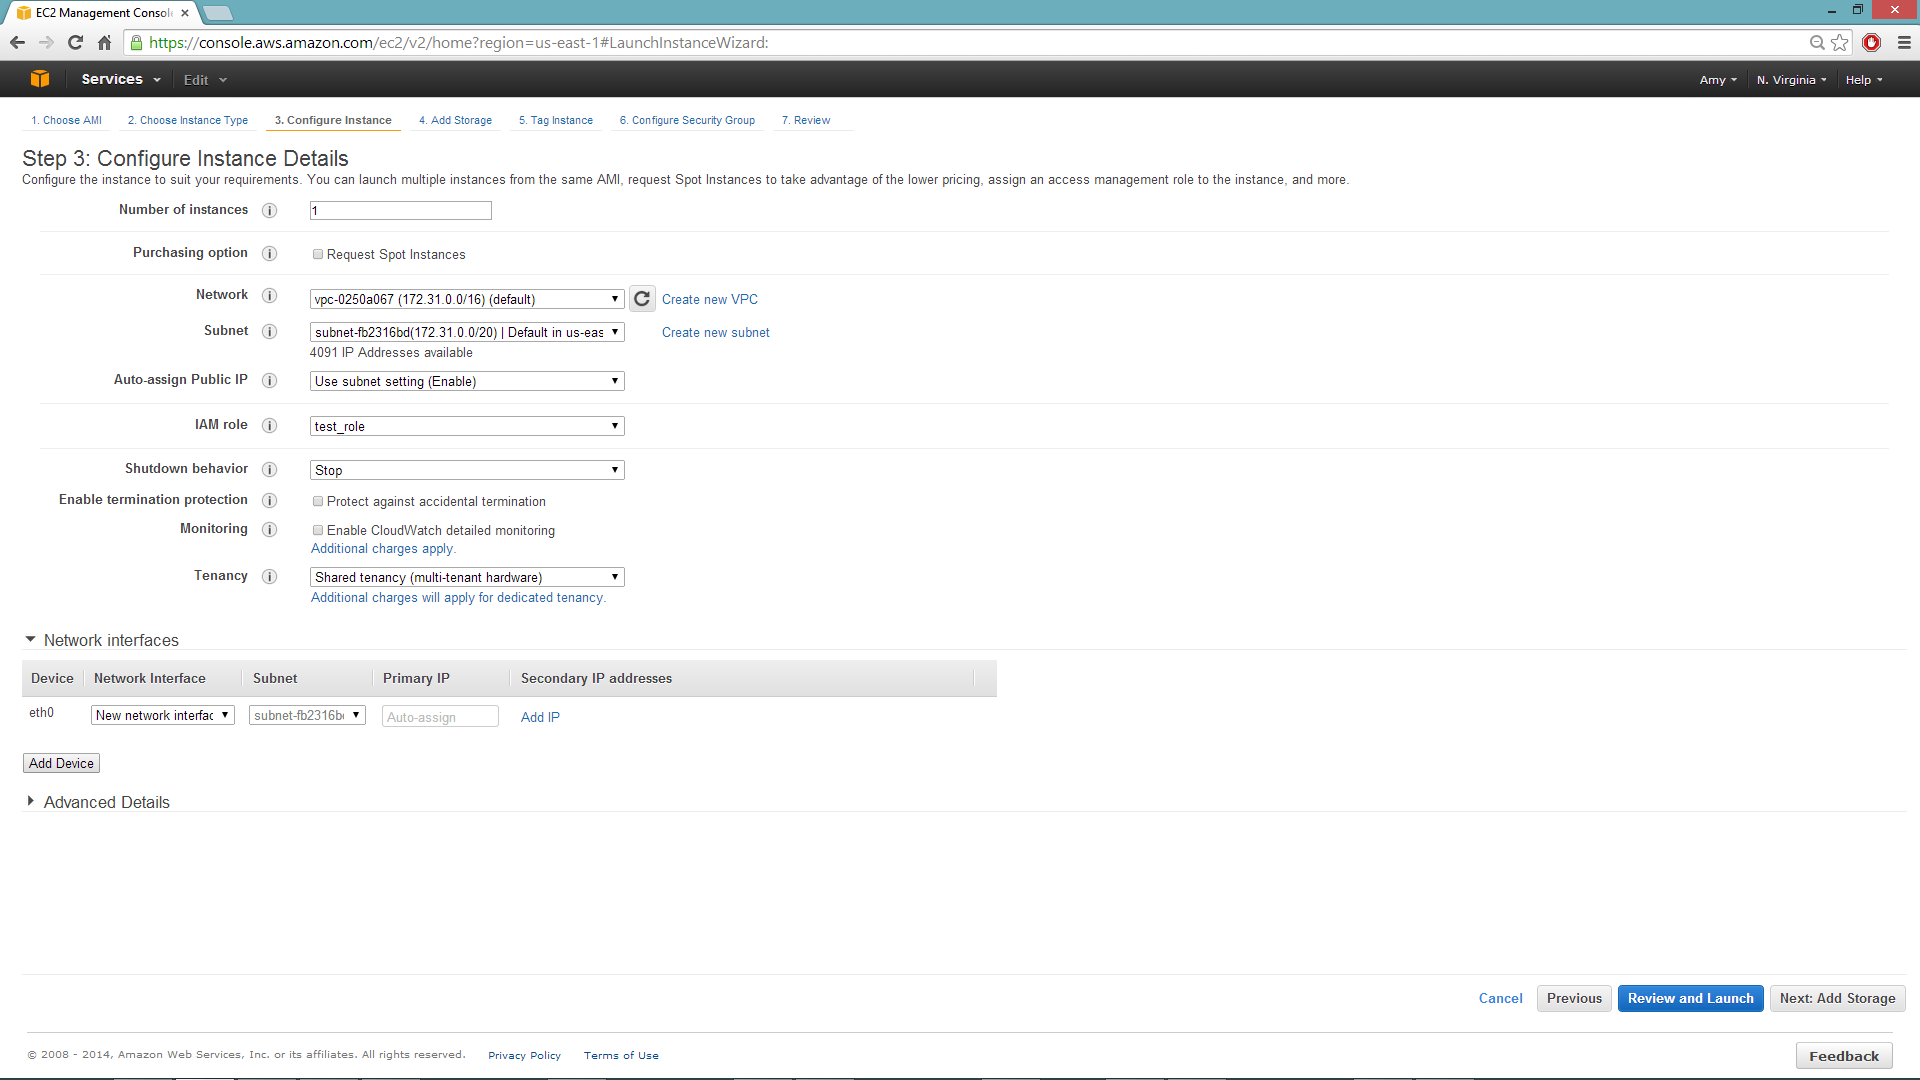
Configuring the Instance
- Select the IAM role and policy to use to launch the instance. H2O detects the temporary access keys associated with the instance, so you don’t need to copy your AWS credentials to the instances.
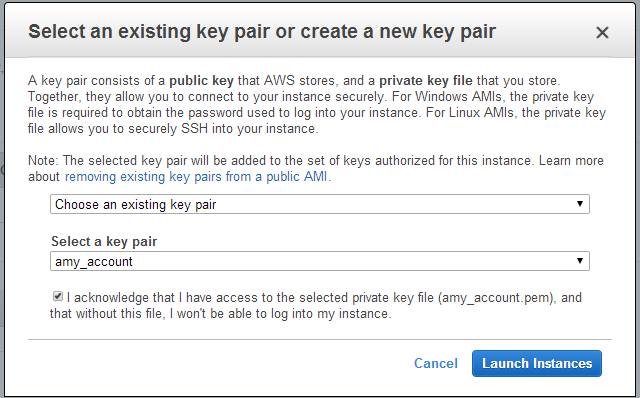
- When launching the instance, select an accessible key pair.
(Windows Users) Tunneling into the Instance
For Windows users that do not have the ability to use ssh from the
terminal, either download Cygwin or a Git Bash that has the capability
to run ssh:
ssh -i amy_account.pem ec2-user@54.165.25.98``
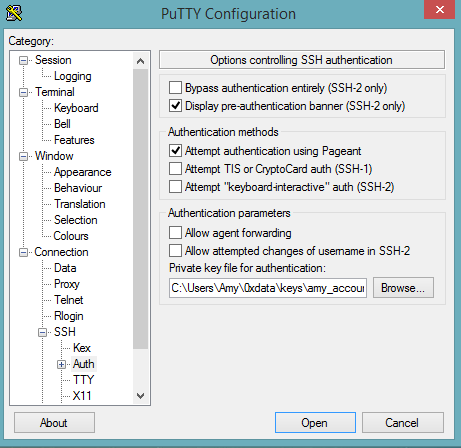
Otherwise, download PuTTY and follow these instructions:
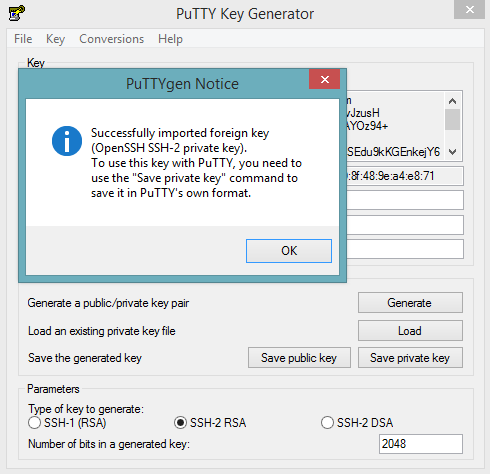
- Launch the PuTTY Key Generator.
- Load your downloaded AWS pem key file.
Note: To see the file, change the browser file type to “All”.
- Save the private key as a .ppk file.
- Launch the PuTTY client.
- In the Session section, enter the host name or IP address. For
Ubuntu users, the default host name is
ubuntu@<ip-address>. For Linux users, the default host name isec2-user@<ip-address>.
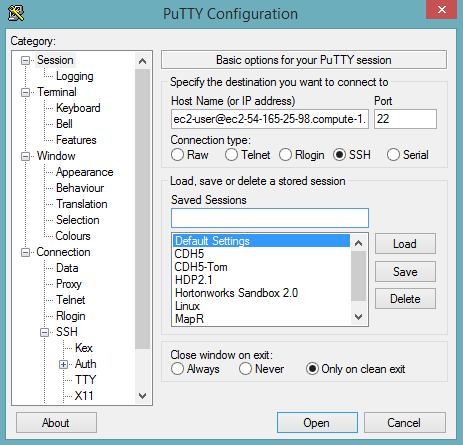
- Select SSH, then Auth in the sidebar, and click the Browse button to select the private key file for authentication.
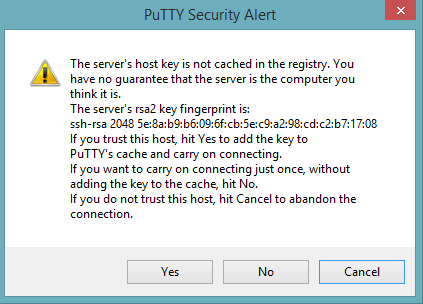
- Start a new session and click the Yes button to confirm caching of the server’s rsa2 key fingerprint and continue connecting.
Downloading Java and H2O
Download Java (JDK 1.7 or later) if it is not already available on the instance.
To download H2O, run the
wgetcommand with the link to the zip file available on our website by copying the link associated with the Download button for the selected H2O build.wget http://h2o-release.s3.amazonaws.com/h2o/{{branch_name}}/{{build_number}}/index.html unzip h2o-{{project_version}}.zip cd h2o-{{project_version}} java -Xmx4g -jar h2o.jar
From your browser, navigate to
<Private_IP_Address>:54321or<Public_DNS>:54321to use H2O’s web interface.