Using H2O with Azure - BETA
Microsoft Azure provides an important collection of cloud services, such as serverless computing, virtual machines, storage options, networking, and much more. Azure provides the tools for a user to create a Data Science environment with H2O.
This section describes the H2O Application for HDInsight on Microsoft Azure:
Note: This feature is currently in Beta and should be used for testing purposes only.
H2O Artificial Intelligence for Azure HDInsight
The H2O Artificial Intelligence for Azure HDInsight is an application you can install during the creation of a new HDInsight cluster on Azure. This solution will install Sparkling Water on your Spark cluster, allowing you to exploit all the benefits from both Spark and H2O.
Create the H2O AI for Azure HDInsight
Follow the steps below to create a new H2O Artificial Intelligence for Azure HDInsight.
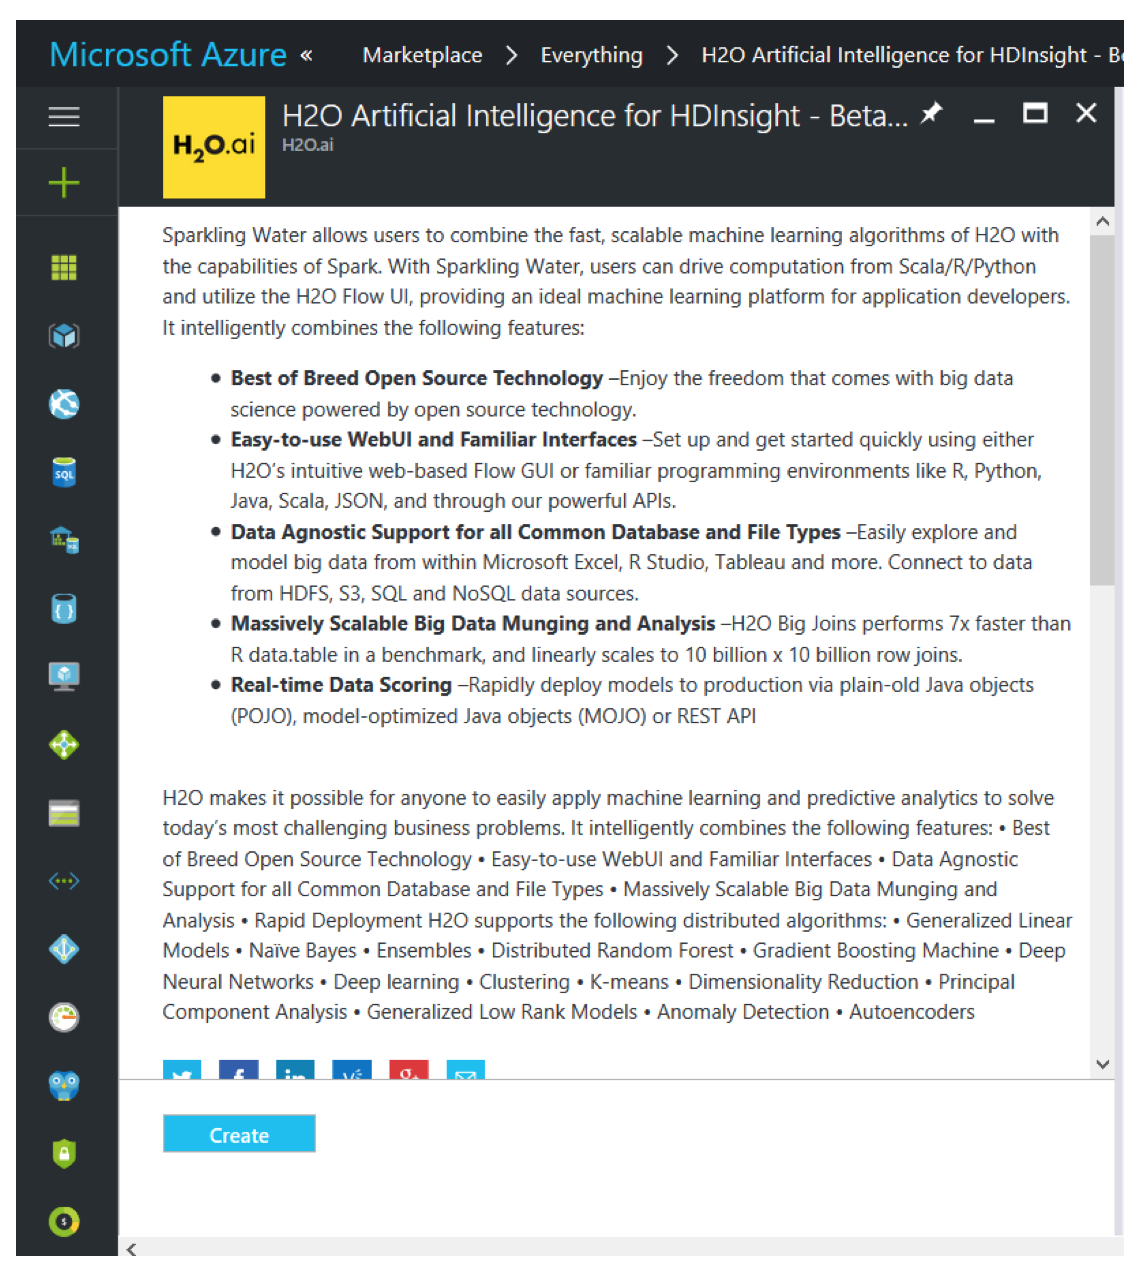
In your Azure portal at https://portal.azure.com, search for H2O, and select H2O Artificial Intelligence for HDInsight.
Click the Create button, and follow the UI instructions.
Note: H2O for HDInsight is exclusively for Spark HDI clusters version 3.5 (HDI v3.5).
In the next screen, under Basics, change the Cluster Type to Spark 2.0.2. Sparkling Water is currently configured to work only on Spark 2.0 and above.
On the Applications tab, select and accept the Terms of Use for H2O.
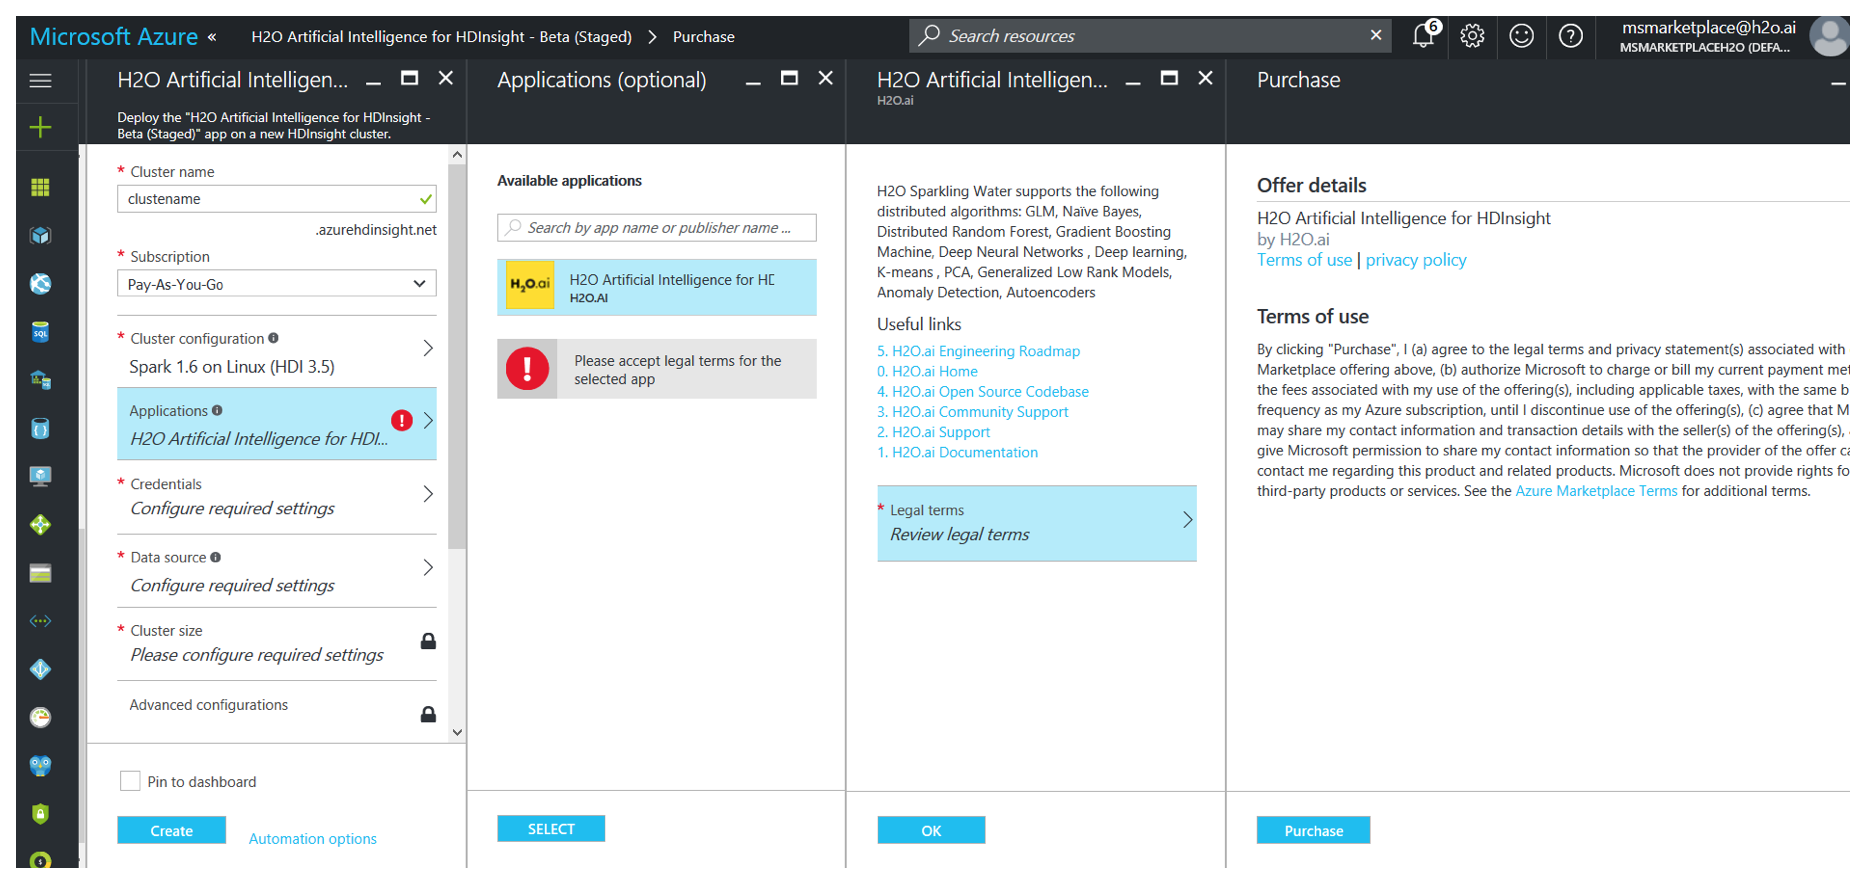
On the Credentials tab, specify the following:
- Cluster Login username and password. These are used to connect to your cluster.
- SSH Username and password. These are used to connect direcly to the VM present in the cluster.
On the Data Source tab, you can configure either a Storage Account or a Data Lake Store. This is where your HDFS system will be located.
On the Cluster Size tab, select the number of workers nodes you want on your HDI Cluster. Note that you can resize your cluster any time after creation.
Click Create to begin the cluster creation. Note that the cluster creation process can take up to 30 minutes.
Connect to your Jupyter Notebooks through https://<ClusterName>.azurehdinsight.net/jupyter, and log in using the Cluster Login username and password that you previously created.
In Jupyter, you will see 3 folders: H2O-PySparkling-Examples, PySpark Examples, and Scala Examples. Select H2O-PySparkling-Examples.
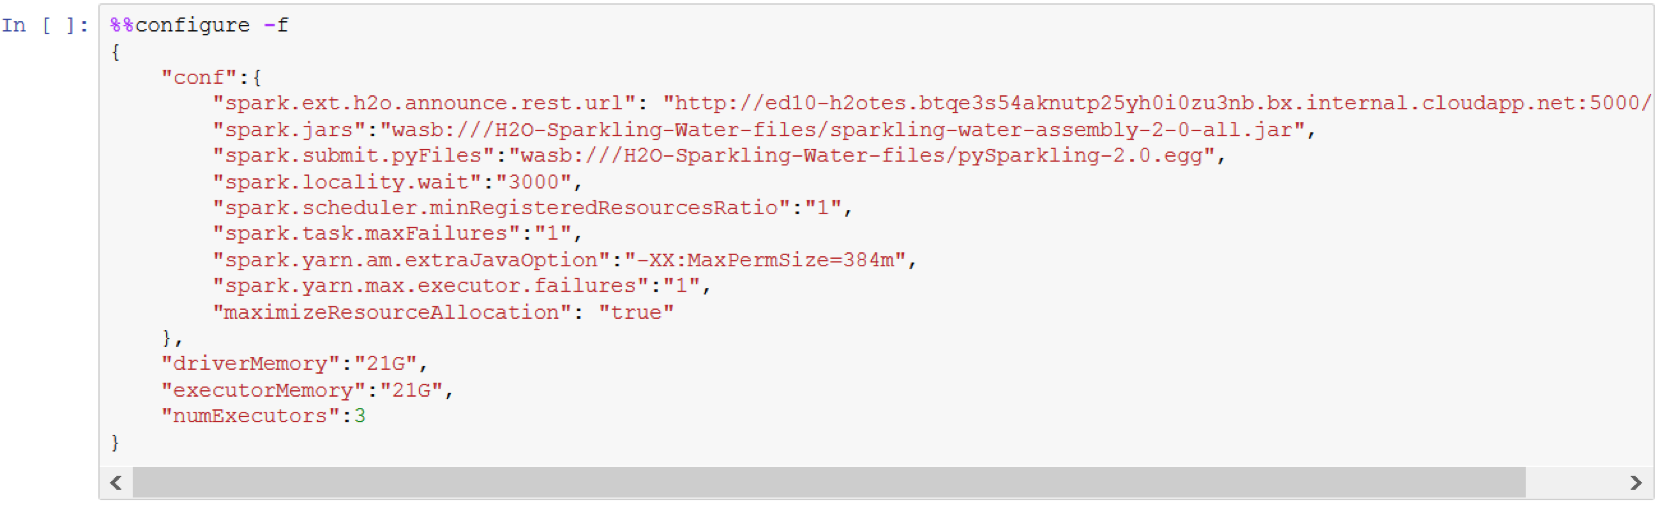
The first step when creating a new notebook is to configure the Spark environment. This information is included in the Sentiment_analysis_with_Sparkling_Water example. When configuring the Spark environment, be sure to use the correct jar, and specify the IP address provided by the output of the first cell.
- Start the H2O Cluster.
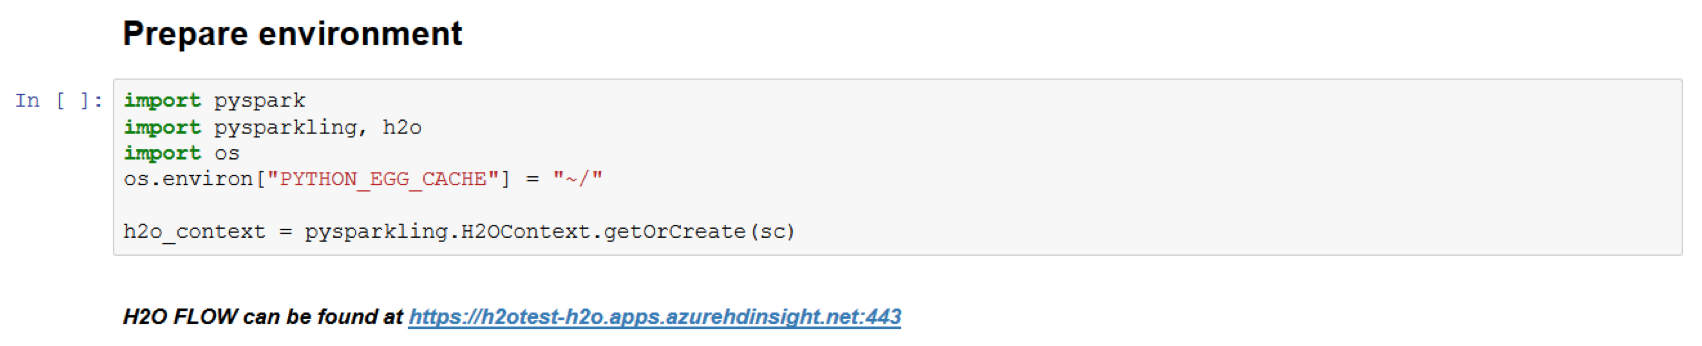
You are now ready to start building your H2O Models.
Note: To connect to H2O Flow, go to https://<ClusterName>-h2o.apps.azurehdinsight.net/
Troubleshooting Tips
- If H2O Flow will not launch after the H2O cluster creation, clean your browser cache.
- Make sure that the cluster has enough resources to allocate to your Spark application. For more information about the cluster available resources, go to http://<ClusterName>.azurehdinsight.net.